帝王谷资源网 Design By www.wdxyy.com
上礼拜去影棚,蹭了一张照片,回家各种P、各种修,正好使用到了问题中所描述的风格。来给大家提供精修版教程。
从网络图片作简单分析:
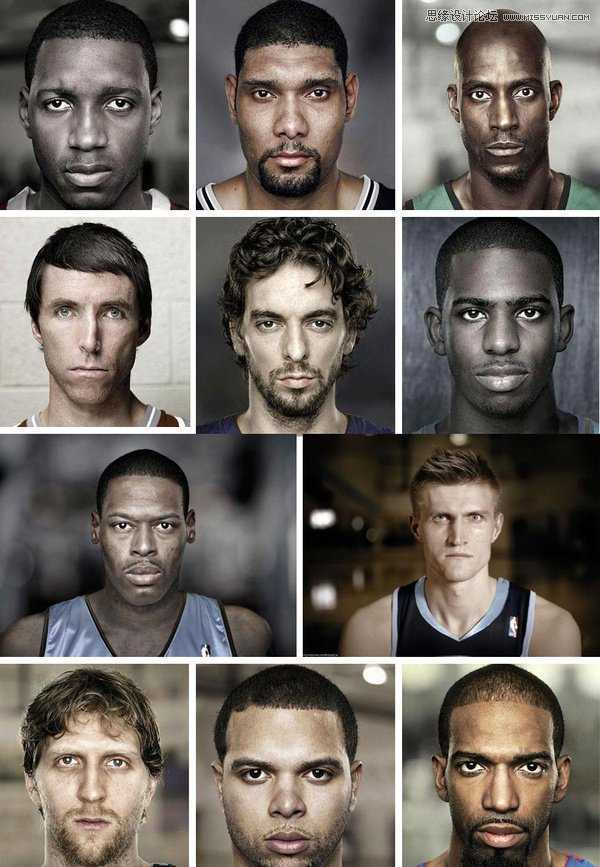
1.从NBA球员定妆照来看,黑人因肤色等原因,会比白人更加能够突出皮肤的质感。
2.毛发多的,会比毛发少的更能突出质感。
3.脸部轮廓清晰的,会比包子脸的更有质感。
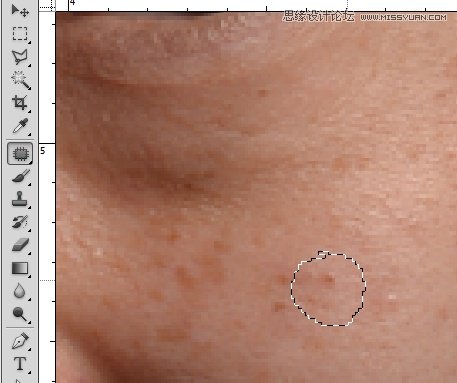
第一步:使用修补工具,去除脸上的痘印、眼袋等。但是不要去除疤痕与毛孔。
第二步:给简单修好的图层添加色阶图层。
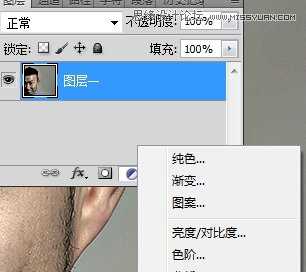
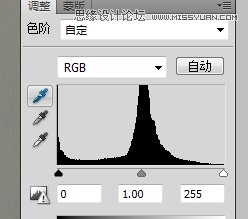
第三步:调整色阶,加强照片的明暗对比关系。但是切记,不要弄得太黑或者太白,整体看起来还是偏灰色的感觉。
第四步:将图层一复制,图层设置为柔光。(为了方便后面大家看得明白,建议将复制图层一副本改名为图层二)
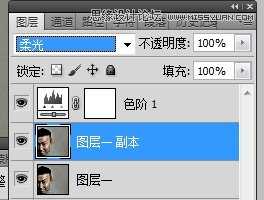
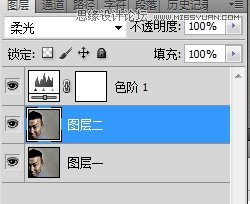
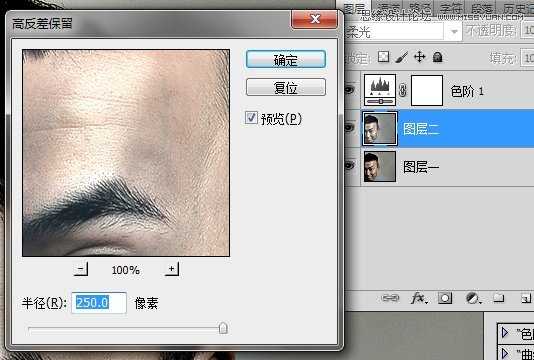
第五步:选中图层二,在滤镜中选择→其它→保留高反差。【具体半径自己感受着调就行了】。
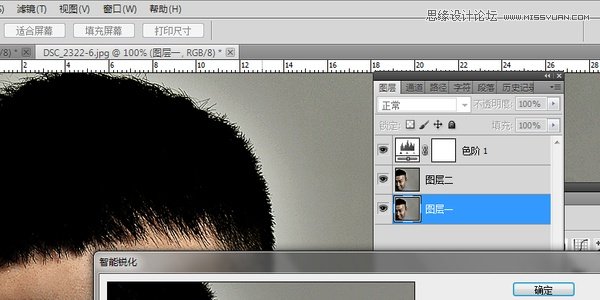
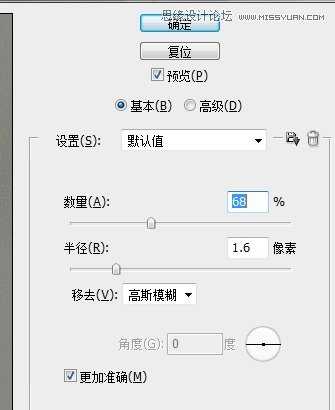
第六步:选中图层一,在滤镜中选择→锐化→智能锐化。【这一步很重要,皮肤的质感就靠这一步了。调整后,皮肤的纹理基本上就比较清晰了,沧桑感也出来了】
第七步:【可有选择性执行】:如果觉得皮肤的质感还是不够的话,选择图层二,将第六步的步骤再重复一次。
第八步:选择色阶图层,在以上加入一个通道混合器。
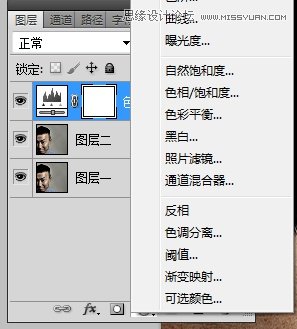
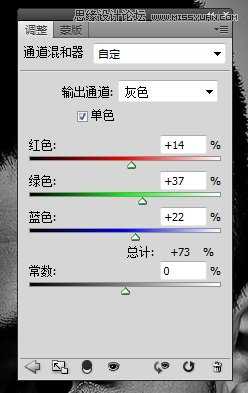
第九步:通道混合器勾选单色,然后根据窗口中的照片感觉进行微调。
第十步:色阶与通道混合器两个图层互相调整,边调边注意照片的细微变化。
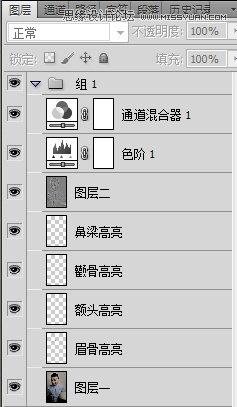
第十一步:选中图层一,将鼻梁的高光区域选中。将选中的区域复制粘贴为新的图层。(可使用快捷键ctrl+c,ctrl+v来完成)
第十二步:通过曲线,将我们新建出来的鼻梁高亮图层整体提亮。
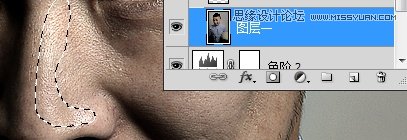
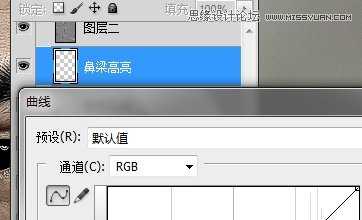
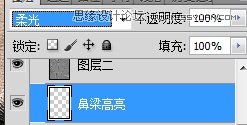
第十三步:将鼻梁高亮图层属性改为柔光。这样整体看起来就自然多了。再用橡皮擦轻轻的修饰一下边缘的过度。
前后对比:
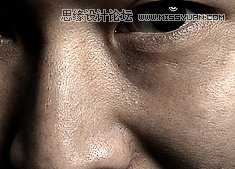
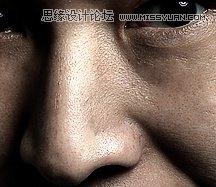
第十四步:面部通常除了鼻梁以外,还有颧骨、眉骨、额头等地方也需要提高局部亮度。选择需要提亮的部位,按照第十一到第十三步重复就行了。
局部提亮前后对比
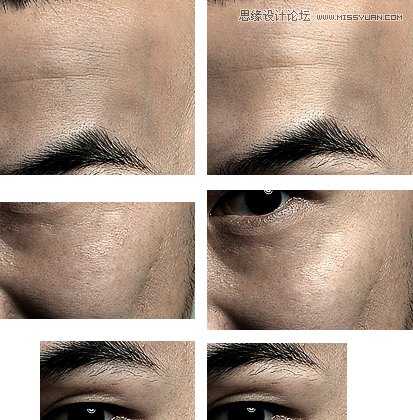
第十五步:最终细节修饰。看看照片整体效果,调整色调,色阶和通道混合器就行了。
最终效果图

从网络图片作简单分析:
1.从NBA球员定妆照来看,黑人因肤色等原因,会比白人更加能够突出皮肤的质感。
2.毛发多的,会比毛发少的更能突出质感。
3.脸部轮廓清晰的,会比包子脸的更有质感。

第一步:使用修补工具,去除脸上的痘印、眼袋等。但是不要去除疤痕与毛孔。
第二步:给简单修好的图层添加色阶图层。


第三步:调整色阶,加强照片的明暗对比关系。但是切记,不要弄得太黑或者太白,整体看起来还是偏灰色的感觉。
第四步:将图层一复制,图层设置为柔光。(为了方便后面大家看得明白,建议将复制图层一副本改名为图层二)


第五步:选中图层二,在滤镜中选择→其它→保留高反差。【具体半径自己感受着调就行了】。
第六步:选中图层一,在滤镜中选择→锐化→智能锐化。【这一步很重要,皮肤的质感就靠这一步了。调整后,皮肤的纹理基本上就比较清晰了,沧桑感也出来了】
第七步:【可有选择性执行】:如果觉得皮肤的质感还是不够的话,选择图层二,将第六步的步骤再重复一次。
第八步:选择色阶图层,在以上加入一个通道混合器。

第九步:通道混合器勾选单色,然后根据窗口中的照片感觉进行微调。
第十步:色阶与通道混合器两个图层互相调整,边调边注意照片的细微变化。
第十一步:选中图层一,将鼻梁的高光区域选中。将选中的区域复制粘贴为新的图层。(可使用快捷键ctrl+c,ctrl+v来完成)
第十二步:通过曲线,将我们新建出来的鼻梁高亮图层整体提亮。


第十三步:将鼻梁高亮图层属性改为柔光。这样整体看起来就自然多了。再用橡皮擦轻轻的修饰一下边缘的过度。

前后对比:


第十四步:面部通常除了鼻梁以外,还有颧骨、眉骨、额头等地方也需要提高局部亮度。选择需要提亮的部位,按照第十一到第十三步重复就行了。
局部提亮前后对比

第十五步:最终细节修饰。看看照片整体效果,调整色调,色阶和通道混合器就行了。

最终效果图

标签:
金属,肤色
帝王谷资源网 Design By www.wdxyy.com
广告合作:本站广告合作请联系QQ:858582 申请时备注:广告合作(否则不回)
免责声明:本站文章均来自网站采集或用户投稿,网站不提供任何软件下载或自行开发的软件! 如有用户或公司发现本站内容信息存在侵权行为,请邮件告知! 858582#qq.com
免责声明:本站文章均来自网站采集或用户投稿,网站不提供任何软件下载或自行开发的软件! 如有用户或公司发现本站内容信息存在侵权行为,请邮件告知! 858582#qq.com
帝王谷资源网 Design By www.wdxyy.com
暂无评论...
更新日志
2025年02月21日
2025年02月21日
- 小骆驼-《草原狼2(蓝光CD)》[原抓WAV+CUE]
- 群星《欢迎来到我身边 电影原声专辑》[320K/MP3][105.02MB]
- 群星《欢迎来到我身边 电影原声专辑》[FLAC/分轨][480.9MB]
- 雷婷《梦里蓝天HQⅡ》 2023头版限量编号低速原抓[WAV+CUE][463M]
- 群星《2024好听新歌42》AI调整音效【WAV分轨】
- 王思雨-《思念陪着鸿雁飞》WAV
- 王思雨《喜马拉雅HQ》头版限量编号[WAV+CUE]
- 李健《无时无刻》[WAV+CUE][590M]
- 陈奕迅《酝酿》[WAV分轨][502M]
- 卓依婷《化蝶》2CD[WAV+CUE][1.1G]
- 群星《吉他王(黑胶CD)》[WAV+CUE]
- 齐秦《穿乐(穿越)》[WAV+CUE]
- 发烧珍品《数位CD音响测试-动向效果(九)》【WAV+CUE】
- 邝美云《邝美云精装歌集》[DSF][1.6G]
- 吕方《爱一回伤一回》[WAV+CUE][454M]
