帝王谷资源网 Design By www.wdxyy.com
本教程主要使用Photoshop制作金属质感的3D立体字,教程主要使用滤镜工具来制作纹理配合笔刷的使用和素材的合成完成最终效果图,喜欢的朋友让我们一起来学习吧。
教程素材:超酷的3D金属字PS教程素材和节点式PS滤镜Filter Forge 2.008 额外的200多个精品预置
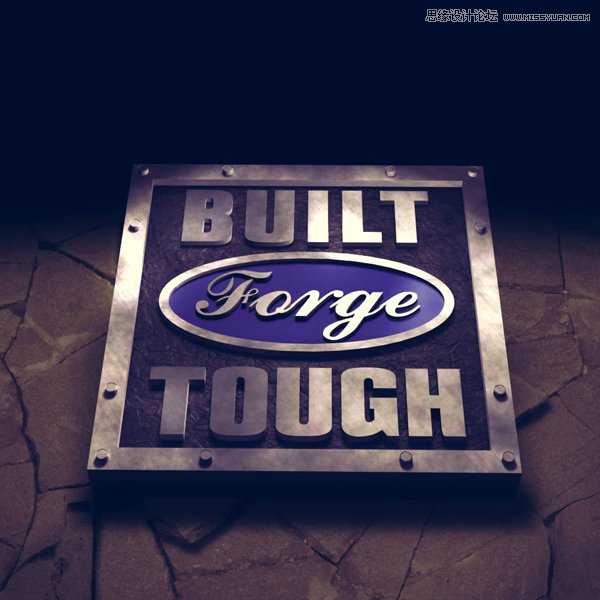
最终效果
1、建立基本框架和文字
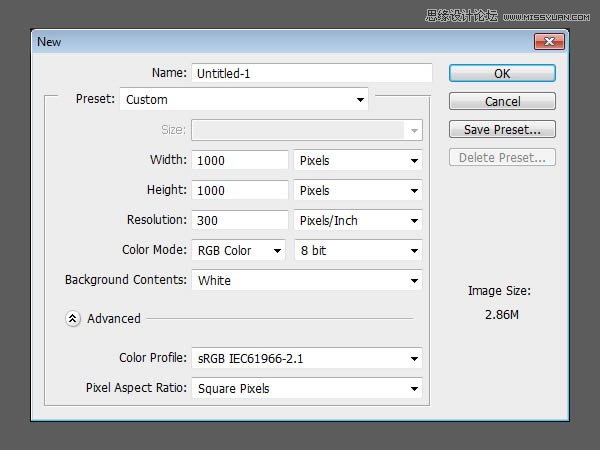
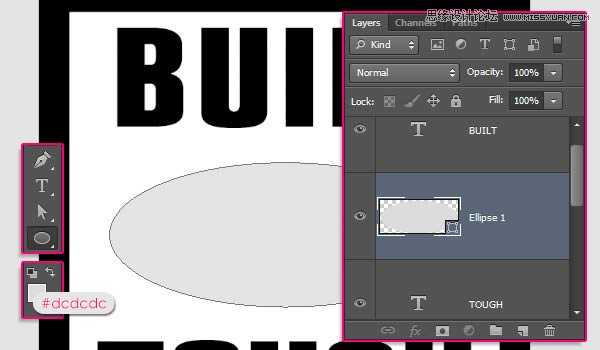
(1)新建文档1000×1000像素文件,设置分辨率为300,填充背景颜色为#dcdcdc
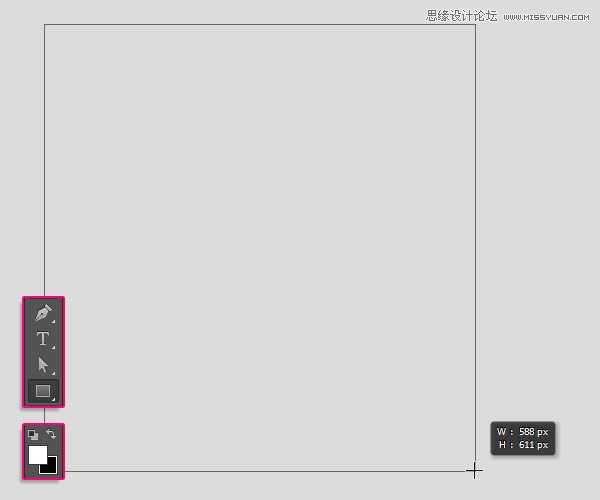
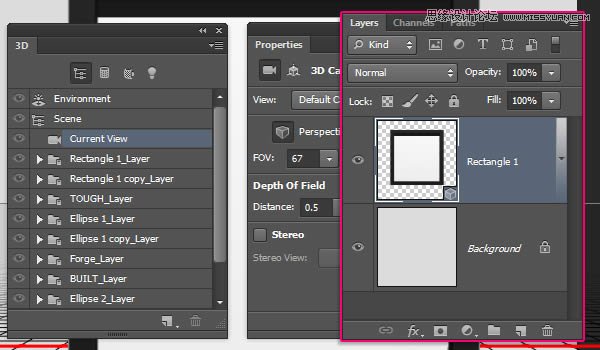
(2)设置前景色为白色,使用矩形工具,创建一个588×611像素的矩形
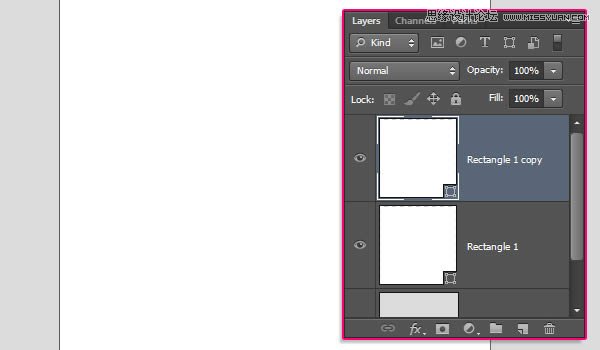
(3)复制矩形层
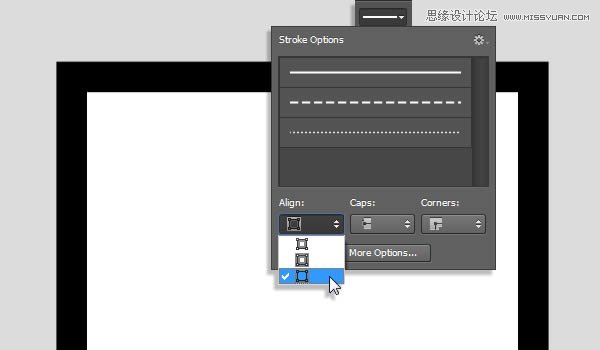
(4)在选项栏,修改填充为无,边框为黑色,大小10点
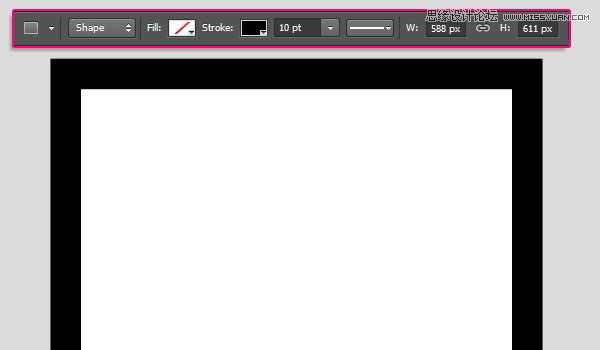
(5)设置边框对齐方式为外面
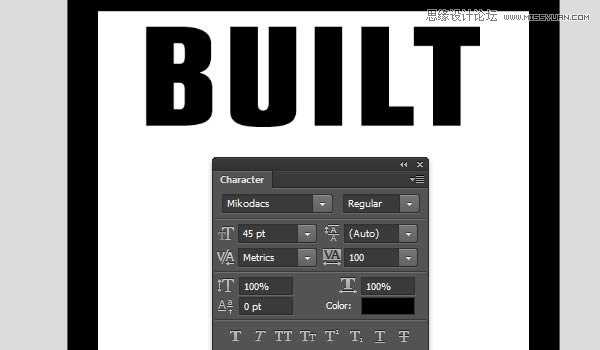
(6)创建文本,使用黑色,大小为45点,间距为100
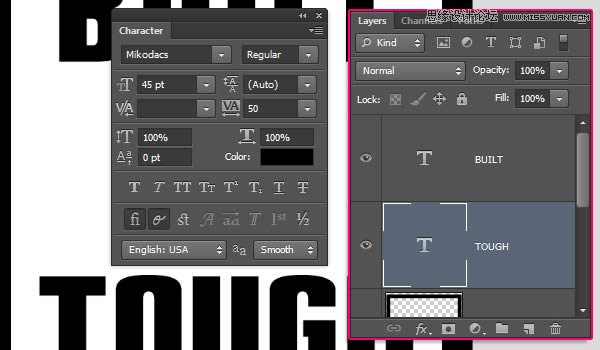
(7)继续创建文本,修改间距为50,其他参数不变
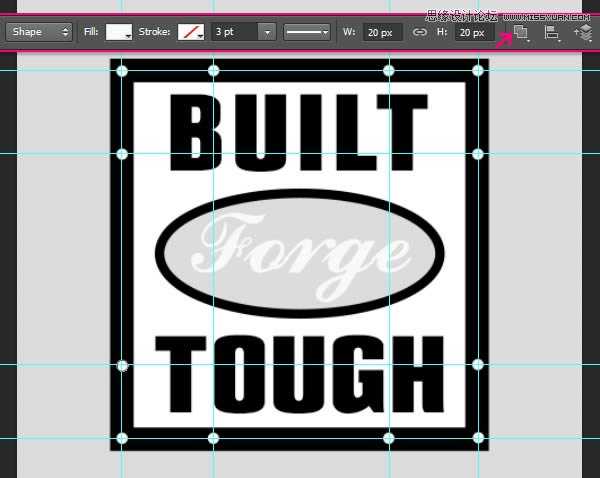
2、创建椭圆形及文字
(1)使用椭圆工具,设置前景色为#dcdcdc,在两个文本层之间创建一个椭圆
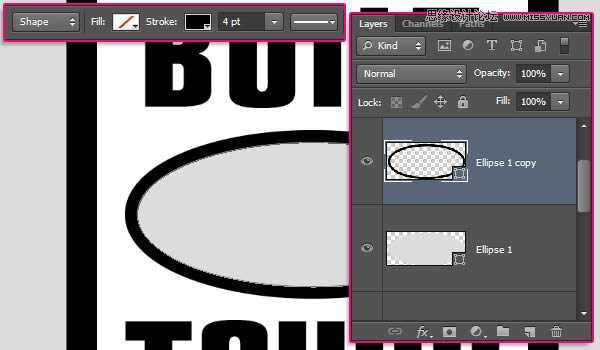
(2)复制椭圆层

(3)修改复制椭圆层的填充为无,边框为黑色,4点,对齐方式为外面
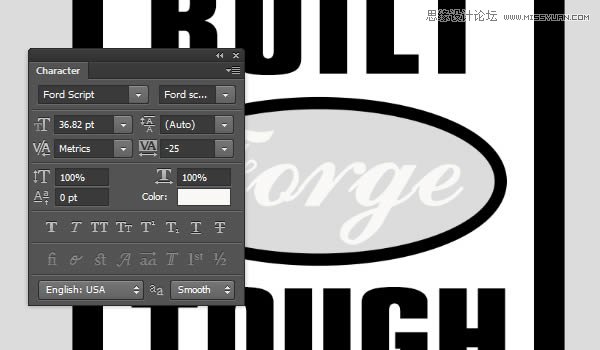
(4)在椭圆中心创建文本,间距为-25
3、添加辅助线,在边框添加小圆形
(1)按住“Ctrl+R”调出标尺,使用移动工具,拖出辅助线
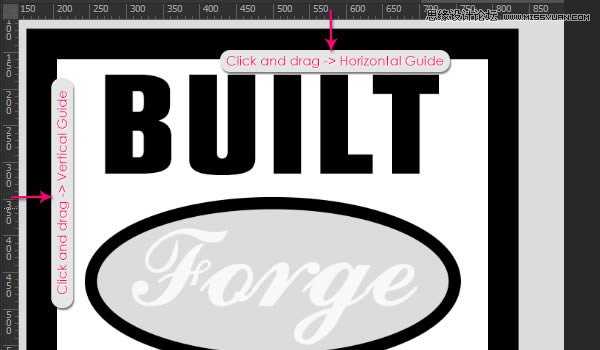


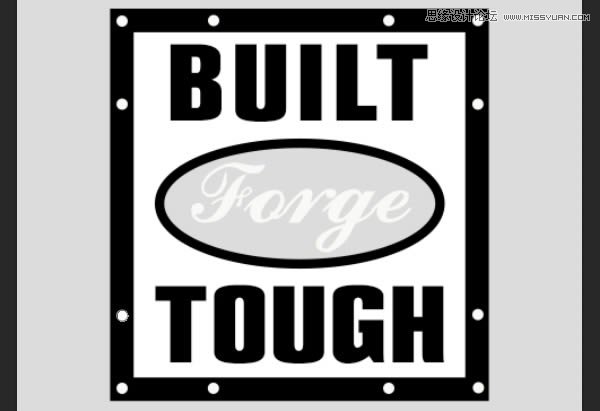
(2)设置前景色为白色,使用椭圆工具,设置固定尺寸为20×20像素,从辅助线交叉处点击拖动,得到下图效果
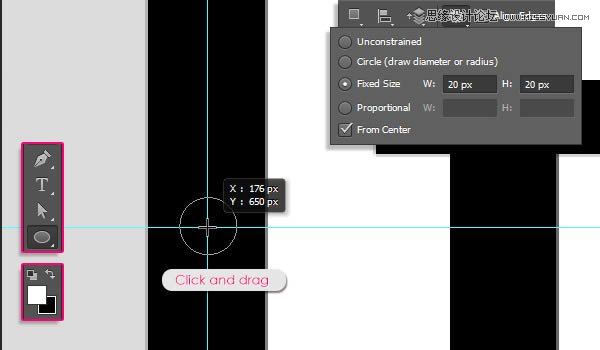
(3)执行“Ctrl+;”,隐藏辅助线
4、转3D图层
(1)除背景层外,对每一层执行“3D>从所选图层新建3D模型”,如果是形状图层,执行“3D>从所选路径新建3D模型”
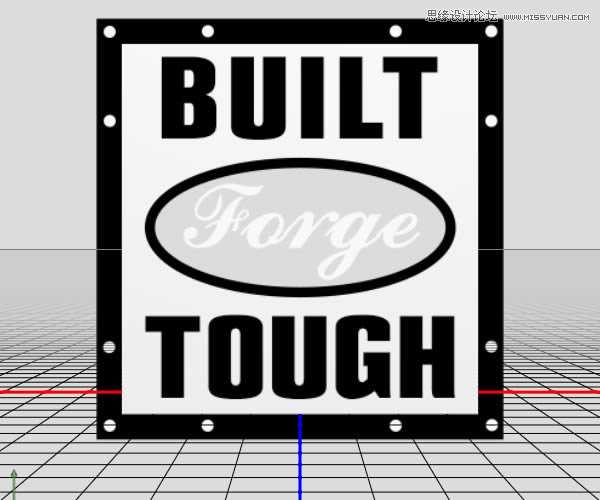
(2)选择所有3D图层,然后执行“3D>合并3D图层”
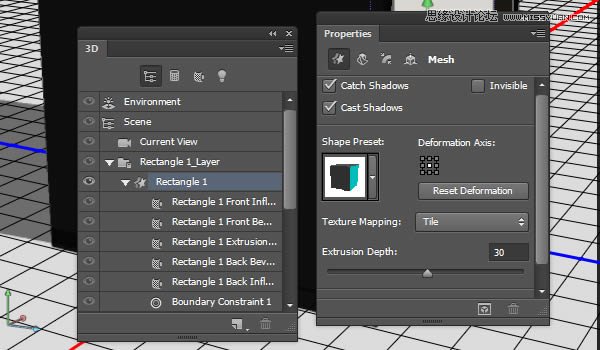
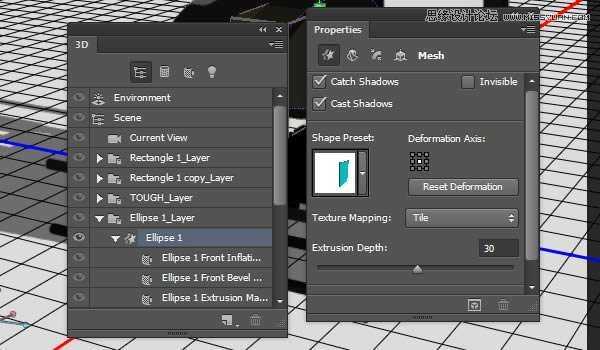
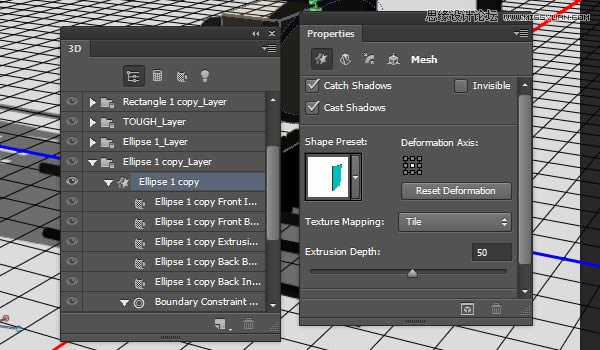
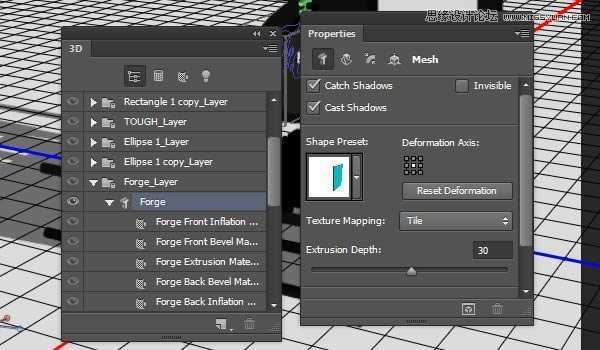
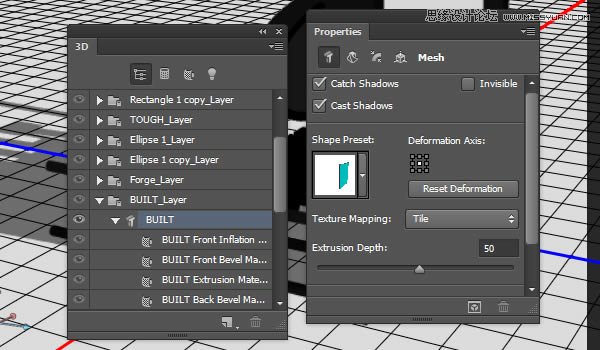
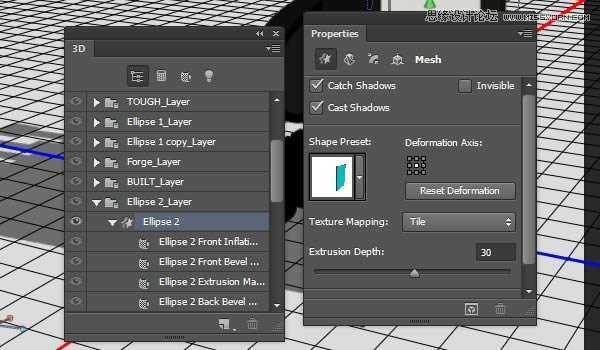
5、修改网格
(1)改变矩形1的挤出深度为30
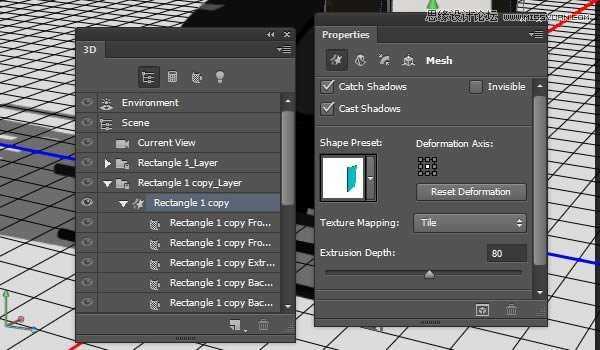
(2)修改矩形1副本的挤出深度为80
(3)修改文本层挤出深度为50

椭圆1挤出深度为30
椭圆1副本挤出深度为50
椭圆中心文本挤出深度为30
最上面的文本挤出深度为50
椭圆2挤出深度为30
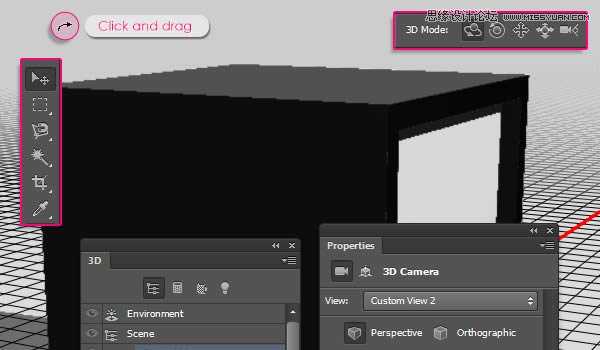
6、移动网格
(1)坐标轴的各项功能如下所示(没做个3D的认识下吧)
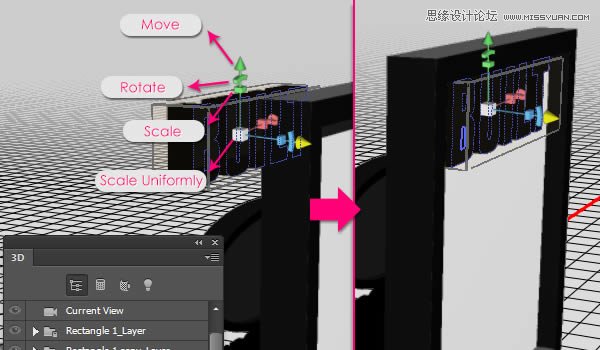
(2)修改各个组件的位置,达到如下效果
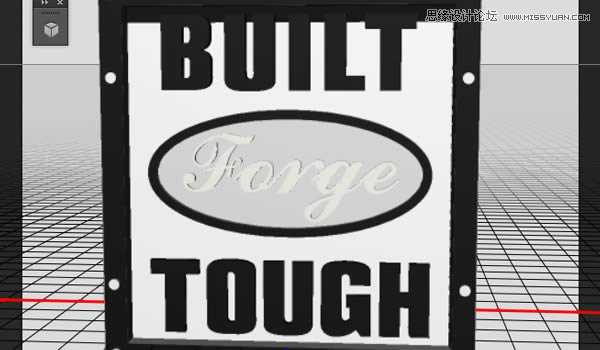
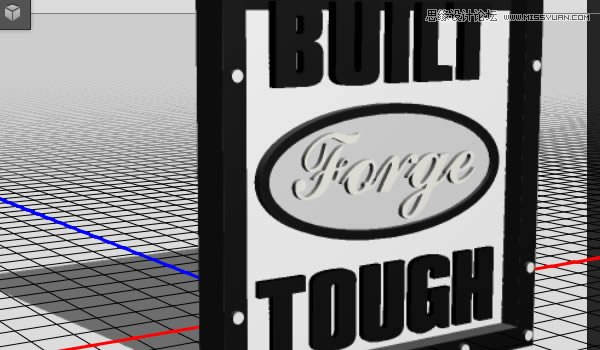
(3)你也可以从各个角度检查每个物件的位置是否正确
7、创建金属纹理
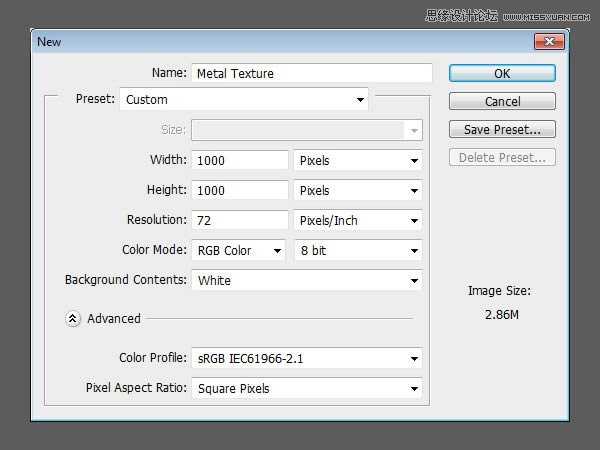
(1)新建1000×1000像素文档,分辨率为72
(2)执行“滤镜>Filter Forge>Filter Forge3”选择下面的材质,并改变参数如下
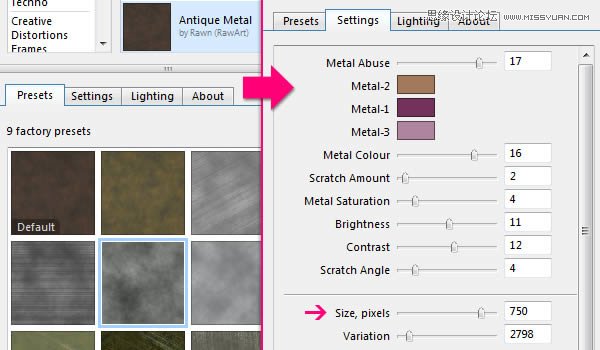
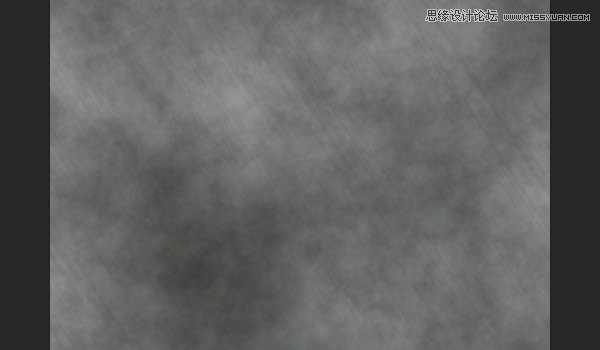
(3)这个是主纹理
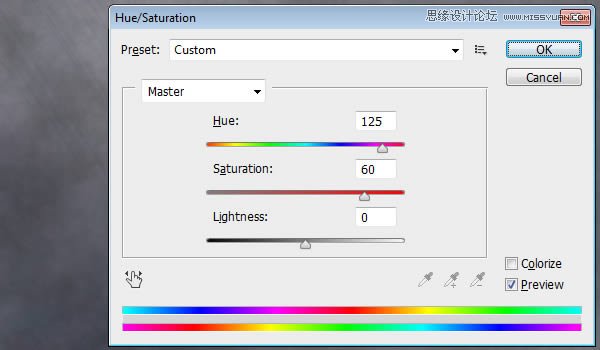
(4)执行“图像>调整>色相饱和度”,改变参数如下:
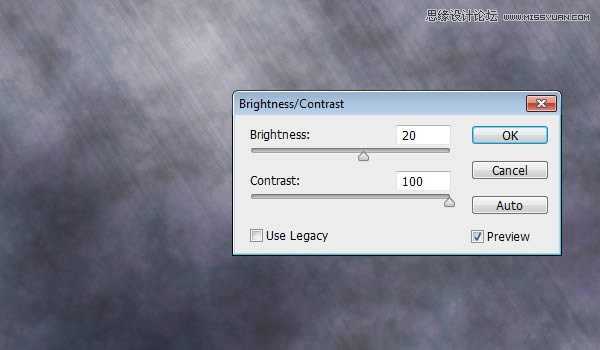
(5)继续修改亮度对比度参数如下,改好后保存为JPG图片命名为“Metal Texture”
8、创建主材质
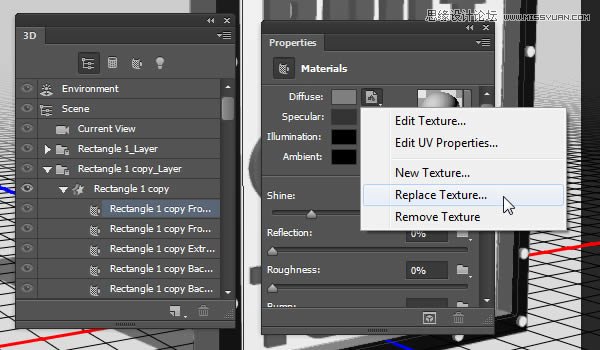
(1)回到原始文档,修改矩形1副本的前面的材质,替换为刚才保存的“Metal Texture”
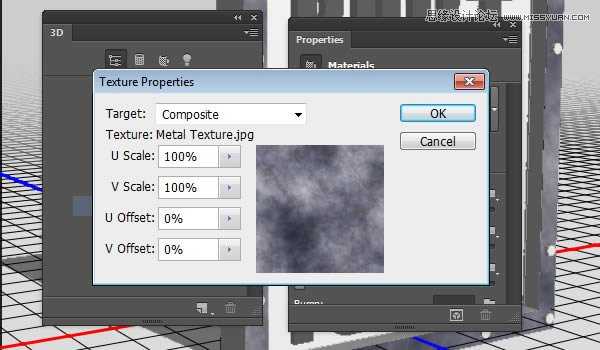
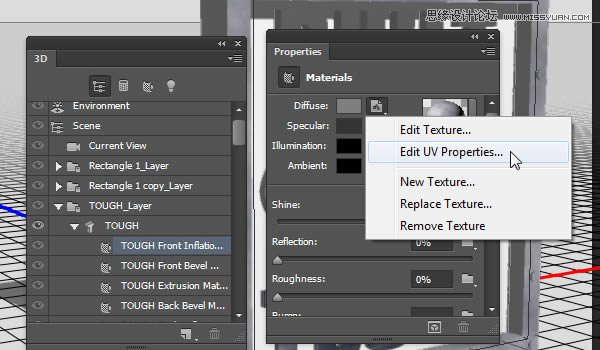
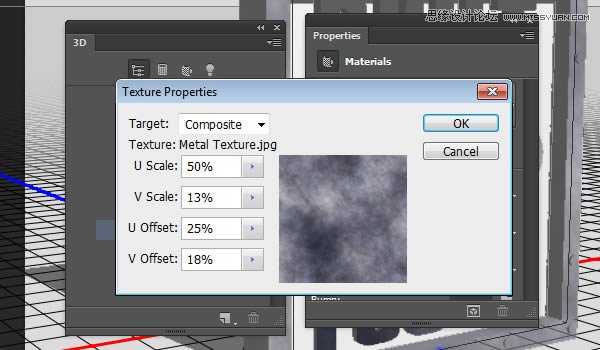
(2)接着选择“Edit UV Properties(编辑贴图属性)”,设置参数如下:
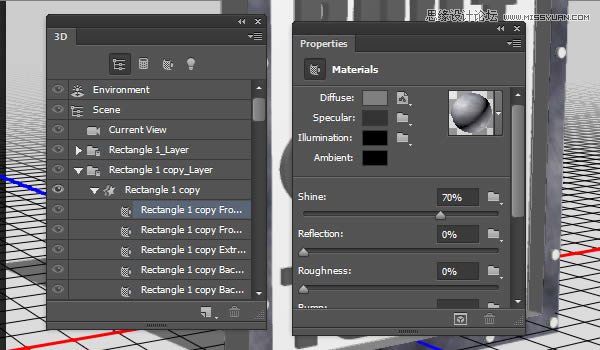
(3)修改“Specular(镜像)”的颜色为#333333,“Illumination(发光)”和“Ambient(环境)”的颜色都为#000000,“Shine(闪亮)”的值为70%
9、保存材质,以便后面再次利用
(1)单击材质预览框箭头,在弹出的菜单中选择“新材质”
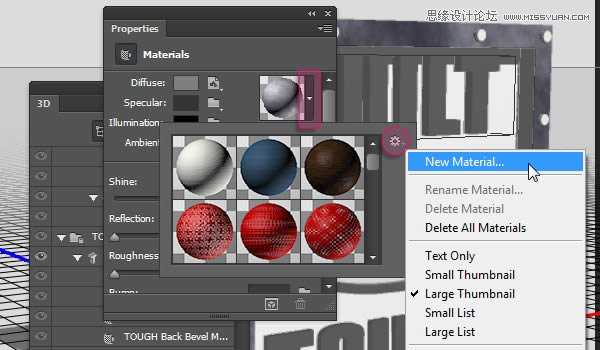
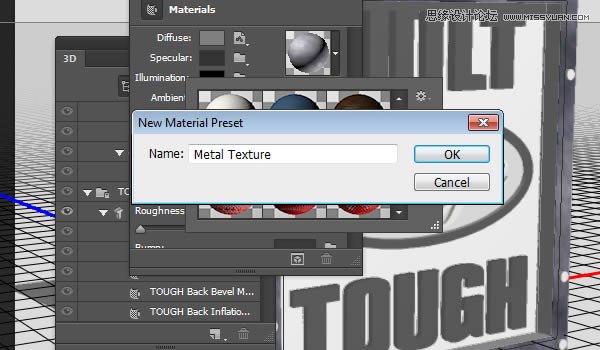
(2)弹出的对话框中,填写材质名称,点确定
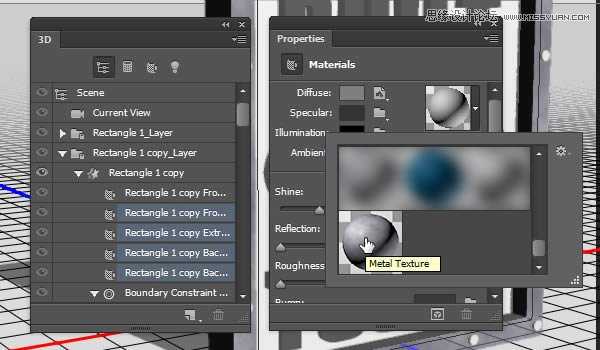
(3)按住shift键,选中矩形1副本剩下的部分,打开材质选择器,应用刚才保存的材质即可
10、修改主材质
(1)选中文字层的前面材质,编辑UV属性,参数设置如下
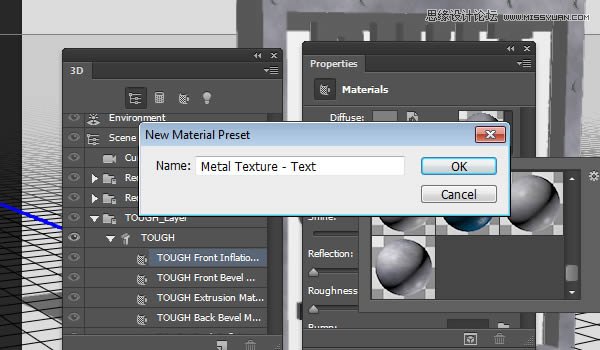
(2)同样保存材质,命名为“Metal Texture-Text”,以方便后面赋予其他文字层
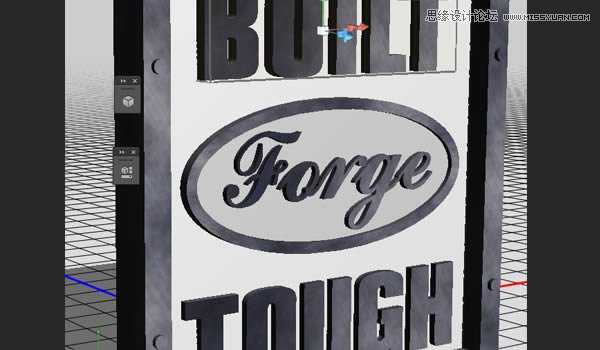
(3)将刚保存的材质应用给其他文字层
11、创建前面的纹理
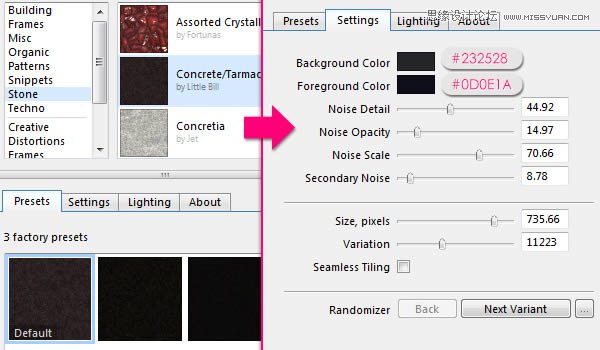
(1)新建文档1000×1000像素,执行“滤镜>Filter Forge>Filter Forge 3”,选择下面的材质,并修改参数如下:
上一页12 下一页 阅读全文
教程素材:超酷的3D金属字PS教程素材和节点式PS滤镜Filter Forge 2.008 额外的200多个精品预置
最终效果
1、建立基本框架和文字
(1)新建文档1000×1000像素文件,设置分辨率为300,填充背景颜色为#dcdcdc
(2)设置前景色为白色,使用矩形工具,创建一个588×611像素的矩形
(3)复制矩形层
(4)在选项栏,修改填充为无,边框为黑色,大小10点
(5)设置边框对齐方式为外面
(6)创建文本,使用黑色,大小为45点,间距为100
(7)继续创建文本,修改间距为50,其他参数不变
2、创建椭圆形及文字
(1)使用椭圆工具,设置前景色为#dcdcdc,在两个文本层之间创建一个椭圆
(2)复制椭圆层
(3)修改复制椭圆层的填充为无,边框为黑色,4点,对齐方式为外面
(4)在椭圆中心创建文本,间距为-25
3、添加辅助线,在边框添加小圆形
(1)按住“Ctrl+R”调出标尺,使用移动工具,拖出辅助线
(2)设置前景色为白色,使用椭圆工具,设置固定尺寸为20×20像素,从辅助线交叉处点击拖动,得到下图效果
(3)执行“Ctrl+;”,隐藏辅助线
4、转3D图层
(1)除背景层外,对每一层执行“3D>从所选图层新建3D模型”,如果是形状图层,执行“3D>从所选路径新建3D模型”
(2)选择所有3D图层,然后执行“3D>合并3D图层”
5、修改网格
(1)改变矩形1的挤出深度为30
(2)修改矩形1副本的挤出深度为80
(3)修改文本层挤出深度为50
椭圆1挤出深度为30
椭圆1副本挤出深度为50
椭圆中心文本挤出深度为30
最上面的文本挤出深度为50
椭圆2挤出深度为30
6、移动网格
(1)坐标轴的各项功能如下所示(没做个3D的认识下吧)
(2)修改各个组件的位置,达到如下效果
(3)你也可以从各个角度检查每个物件的位置是否正确
7、创建金属纹理
(1)新建1000×1000像素文档,分辨率为72
(2)执行“滤镜>Filter Forge>Filter Forge3”选择下面的材质,并改变参数如下
(3)这个是主纹理
(4)执行“图像>调整>色相饱和度”,改变参数如下:
(5)继续修改亮度对比度参数如下,改好后保存为JPG图片命名为“Metal Texture”
8、创建主材质
(1)回到原始文档,修改矩形1副本的前面的材质,替换为刚才保存的“Metal Texture”
(2)接着选择“Edit UV Properties(编辑贴图属性)”,设置参数如下:
(3)修改“Specular(镜像)”的颜色为#333333,“Illumination(发光)”和“Ambient(环境)”的颜色都为#000000,“Shine(闪亮)”的值为70%
9、保存材质,以便后面再次利用
(1)单击材质预览框箭头,在弹出的菜单中选择“新材质”
(2)弹出的对话框中,填写材质名称,点确定
(3)按住shift键,选中矩形1副本剩下的部分,打开材质选择器,应用刚才保存的材质即可
10、修改主材质
(1)选中文字层的前面材质,编辑UV属性,参数设置如下
(2)同样保存材质,命名为“Metal Texture-Text”,以方便后面赋予其他文字层
(3)将刚保存的材质应用给其他文字层
11、创建前面的纹理
(1)新建文档1000×1000像素,执行“滤镜>Filter Forge>Filter Forge 3”,选择下面的材质,并修改参数如下:
上一页12 下一页 阅读全文
标签:
3D,金属字,立体
帝王谷资源网 Design By www.wdxyy.com
广告合作:本站广告合作请联系QQ:858582 申请时备注:广告合作(否则不回)
免责声明:本站文章均来自网站采集或用户投稿,网站不提供任何软件下载或自行开发的软件! 如有用户或公司发现本站内容信息存在侵权行为,请邮件告知! 858582#qq.com
免责声明:本站文章均来自网站采集或用户投稿,网站不提供任何软件下载或自行开发的软件! 如有用户或公司发现本站内容信息存在侵权行为,请邮件告知! 858582#qq.com
帝王谷资源网 Design By www.wdxyy.com
暂无评论...
更新日志
2025年02月19日
2025年02月19日
- 小骆驼-《草原狼2(蓝光CD)》[原抓WAV+CUE]
- 群星《欢迎来到我身边 电影原声专辑》[320K/MP3][105.02MB]
- 群星《欢迎来到我身边 电影原声专辑》[FLAC/分轨][480.9MB]
- 雷婷《梦里蓝天HQⅡ》 2023头版限量编号低速原抓[WAV+CUE][463M]
- 群星《2024好听新歌42》AI调整音效【WAV分轨】
- 王思雨-《思念陪着鸿雁飞》WAV
- 王思雨《喜马拉雅HQ》头版限量编号[WAV+CUE]
- 李健《无时无刻》[WAV+CUE][590M]
- 陈奕迅《酝酿》[WAV分轨][502M]
- 卓依婷《化蝶》2CD[WAV+CUE][1.1G]
- 群星《吉他王(黑胶CD)》[WAV+CUE]
- 齐秦《穿乐(穿越)》[WAV+CUE]
- 发烧珍品《数位CD音响测试-动向效果(九)》【WAV+CUE】
- 邝美云《邝美云精装歌集》[DSF][1.6G]
- 吕方《爱一回伤一回》[WAV+CUE][454M]