帝王谷资源网 Design By www.wdxyy.com
最终效果图

1、新建一个600 x 400的白色文件。
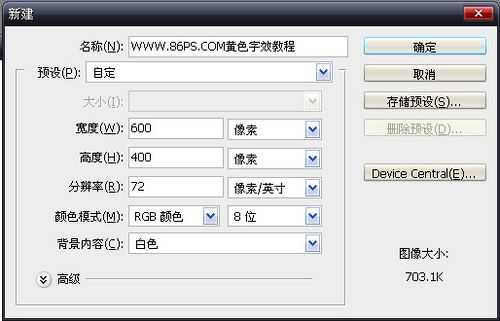
如下:

2、点击前景色,设置颜色#993B17。
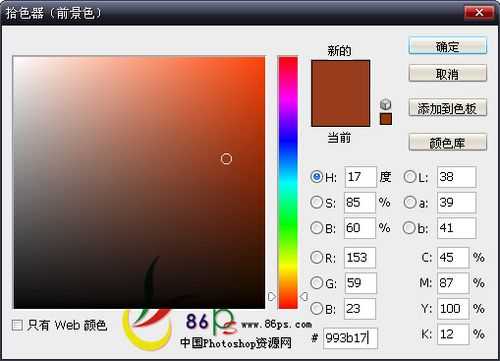
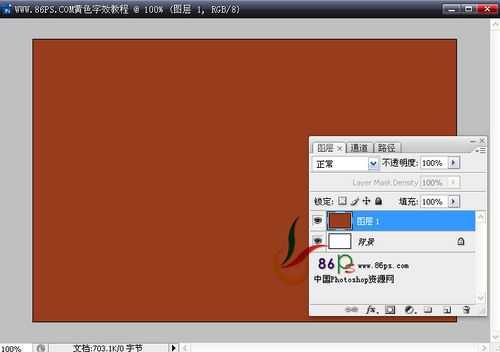
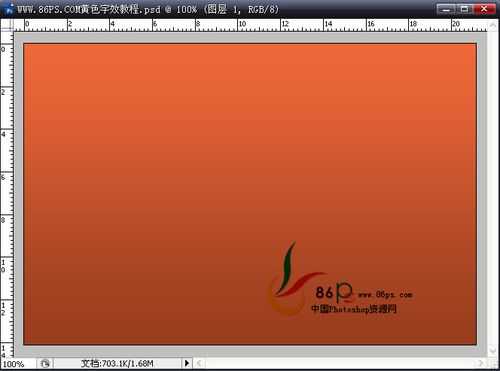
新建图层,用油漆桶工具填充。
3、双击图层1,给字设置一个渐变叠加样式。渐变设置颜色:#993B17,#F06937。
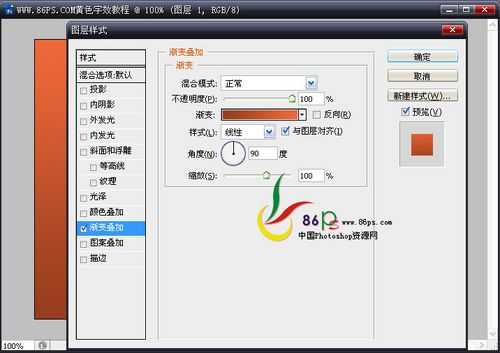
效果如下:
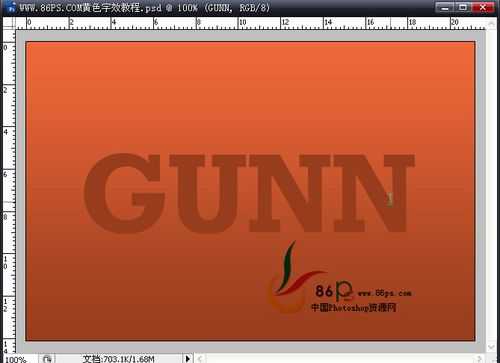
4、选择文字工具,输入文字,字体和颜色都随便,后面还要设置图层样式,所以颜色用什么都没关系,这里就用的前景色。
这里字体不能用那些太细的,否效果不是很好看,最好用粗一点方正的字体。
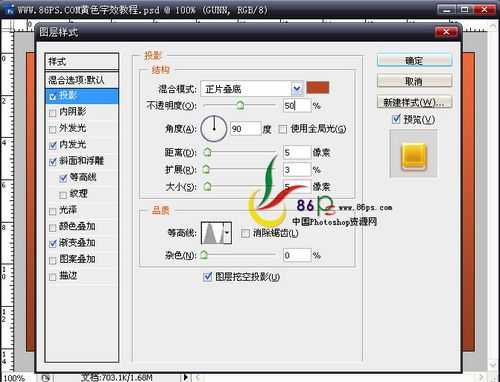
5、给文字设置图层样式,首先是投影,设置如下:
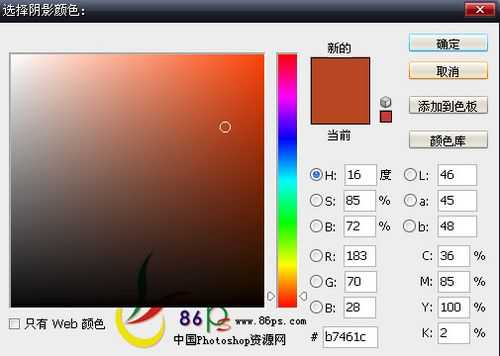
颜色的设置:
内发光:
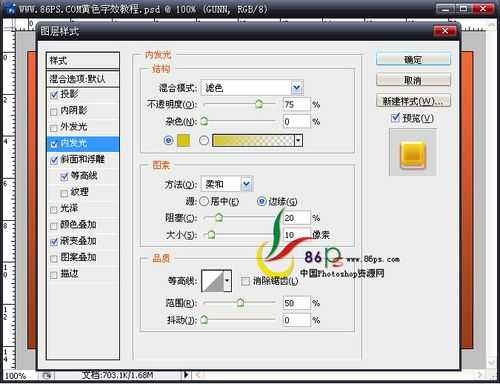
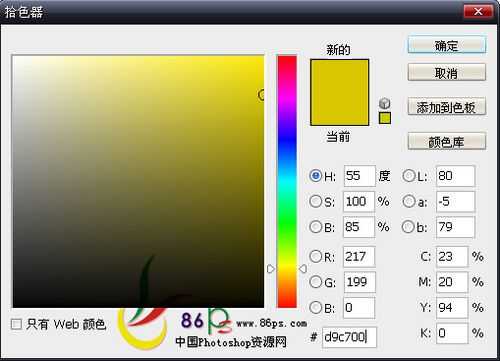
颜色值:
斜面和浮雕
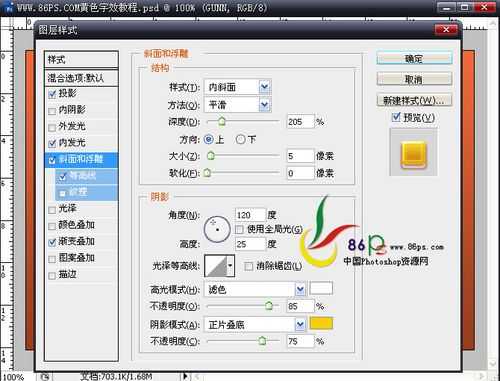
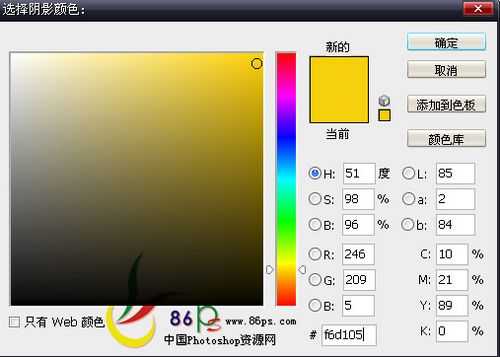
颜色值:
等高线:
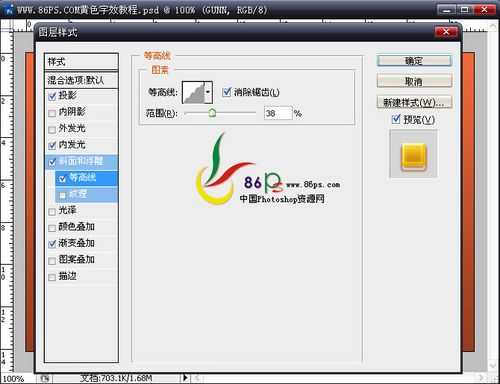
再设置一个渐变叠加:
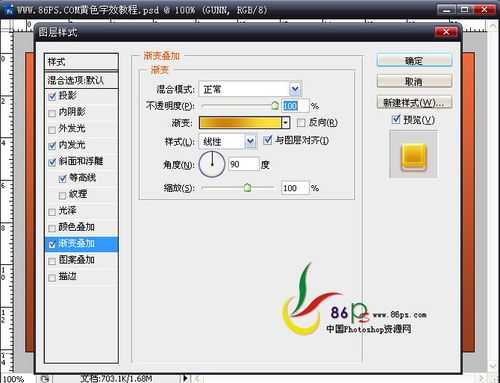
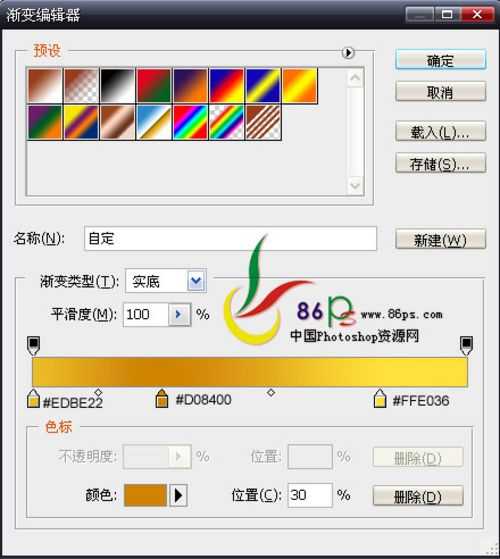
渐变的颜色值:
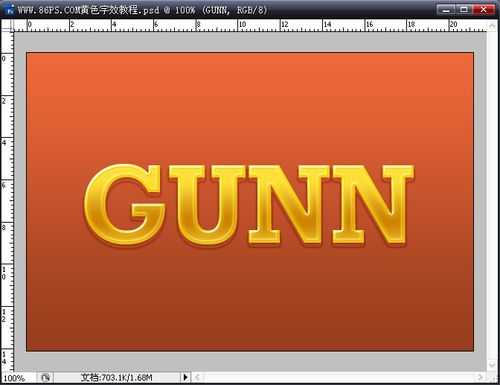
做完后得到效果:
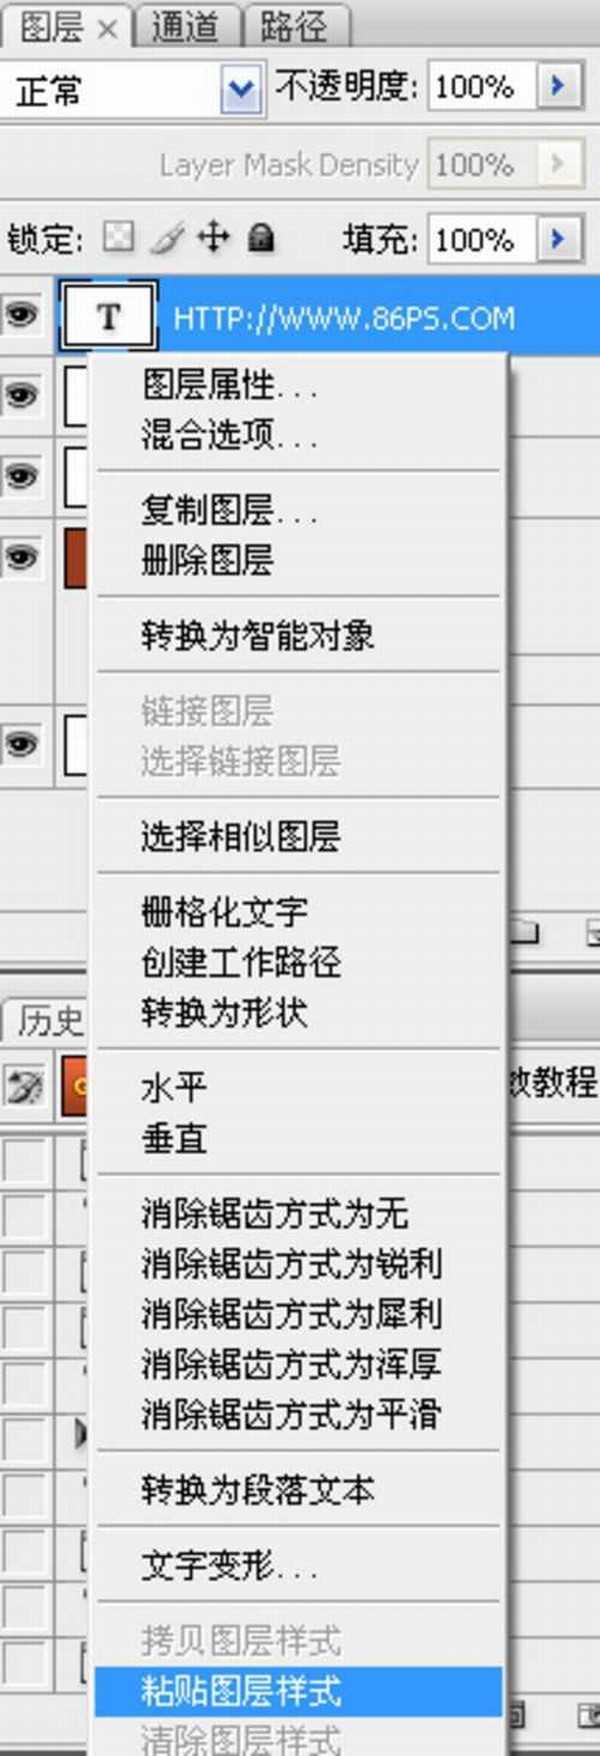
输入其它文字,直接在设好了图层样式的文字图层上点右键—拷贝图层样式。

到新输入的文字图层上点右键—粘贴图层样式。就可以了。
最终效果!


1、新建一个600 x 400的白色文件。

如下:

2、点击前景色,设置颜色#993B17。

新建图层,用油漆桶工具填充。

3、双击图层1,给字设置一个渐变叠加样式。渐变设置颜色:#993B17,#F06937。

效果如下:

4、选择文字工具,输入文字,字体和颜色都随便,后面还要设置图层样式,所以颜色用什么都没关系,这里就用的前景色。
这里字体不能用那些太细的,否效果不是很好看,最好用粗一点方正的字体。

5、给文字设置图层样式,首先是投影,设置如下:

颜色的设置:

内发光:

颜色值:

斜面和浮雕

颜色值:

等高线:

再设置一个渐变叠加:

渐变的颜色值:

做完后得到效果:

输入其它文字,直接在设好了图层样式的文字图层上点右键—拷贝图层样式。

到新输入的文字图层上点右键—粘贴图层样式。就可以了。

最终效果!

标签:
金色,质感,字
帝王谷资源网 Design By www.wdxyy.com
广告合作:本站广告合作请联系QQ:858582 申请时备注:广告合作(否则不回)
免责声明:本站文章均来自网站采集或用户投稿,网站不提供任何软件下载或自行开发的软件! 如有用户或公司发现本站内容信息存在侵权行为,请邮件告知! 858582#qq.com
免责声明:本站文章均来自网站采集或用户投稿,网站不提供任何软件下载或自行开发的软件! 如有用户或公司发现本站内容信息存在侵权行为,请邮件告知! 858582#qq.com
帝王谷资源网 Design By www.wdxyy.com
暂无评论...
更新日志
2025年02月19日
2025年02月19日
- 小骆驼-《草原狼2(蓝光CD)》[原抓WAV+CUE]
- 群星《欢迎来到我身边 电影原声专辑》[320K/MP3][105.02MB]
- 群星《欢迎来到我身边 电影原声专辑》[FLAC/分轨][480.9MB]
- 雷婷《梦里蓝天HQⅡ》 2023头版限量编号低速原抓[WAV+CUE][463M]
- 群星《2024好听新歌42》AI调整音效【WAV分轨】
- 王思雨-《思念陪着鸿雁飞》WAV
- 王思雨《喜马拉雅HQ》头版限量编号[WAV+CUE]
- 李健《无时无刻》[WAV+CUE][590M]
- 陈奕迅《酝酿》[WAV分轨][502M]
- 卓依婷《化蝶》2CD[WAV+CUE][1.1G]
- 群星《吉他王(黑胶CD)》[WAV+CUE]
- 齐秦《穿乐(穿越)》[WAV+CUE]
- 发烧珍品《数位CD音响测试-动向效果(九)》【WAV+CUE】
- 邝美云《邝美云精装歌集》[DSF][1.6G]
- 吕方《爱一回伤一回》[WAV+CUE][454M]
