帝王谷资源网 Design By www.wdxyy.com
最终效果

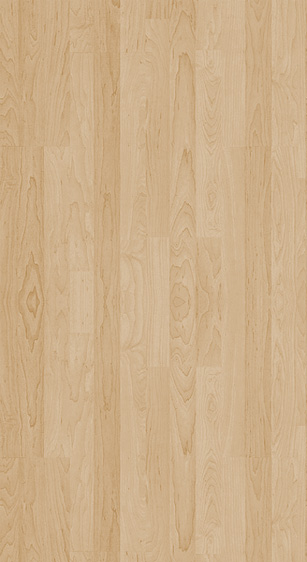
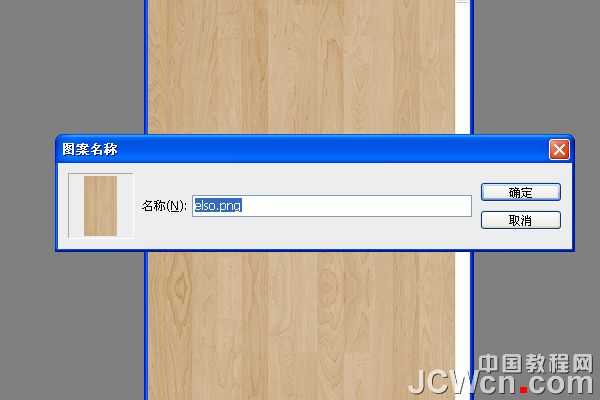
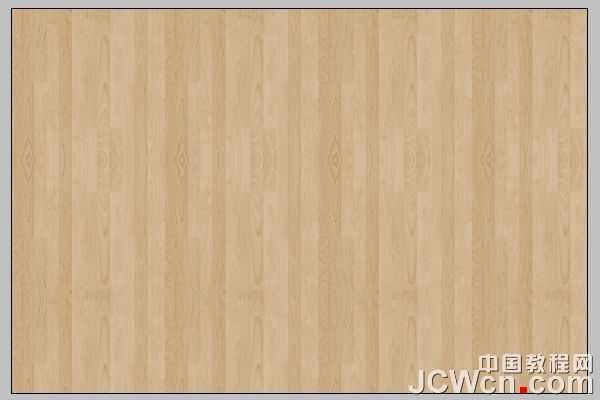
1、在Photoshop中打开木纹素材。 进入编辑- >定义图案 ,随意起一个名字即可,我用的是素材的名字。
2、转到文件- >新建 ,创建一个新的1150 × 768像素的文件。

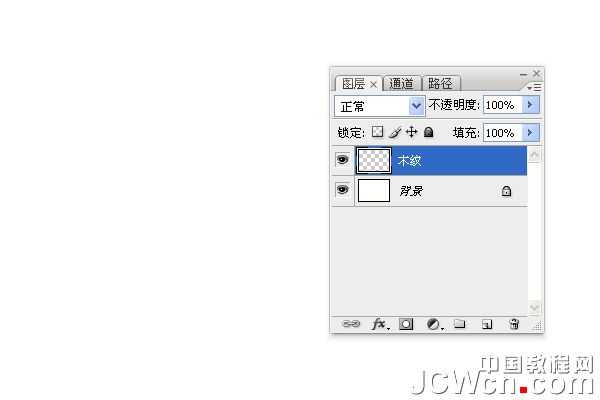
3、在背景层之上创建一个新层,并起名为“木纹”。
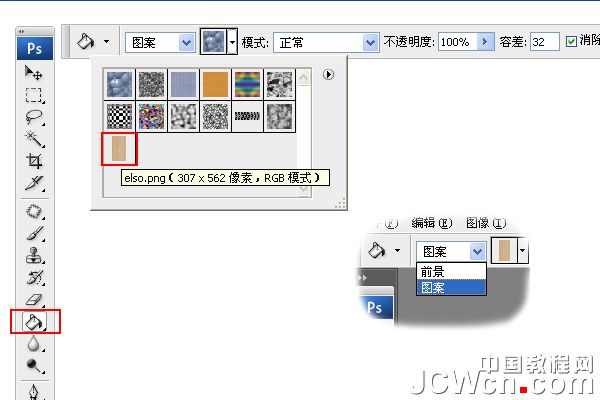
4、选择油漆桶工具 ,并在顶部的“选项”栏中, 选择填充类型的模式,从模式下拉菜单中选择木纹。然后在木纹这个图层上使用用油漆桶工具。
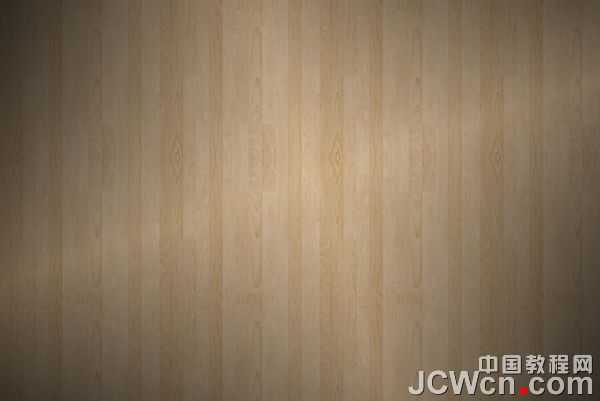
5、“木纹”图层之上创建一个新层,并把它称为“渐变”。 选择渐变工具 ,设置前景色为黑色 ,并在选项栏上,选择“棱形渐变”前景到透明“渐变”,勾选反向框。 单击并拖动文档中心到任意一个角,创建渐变。

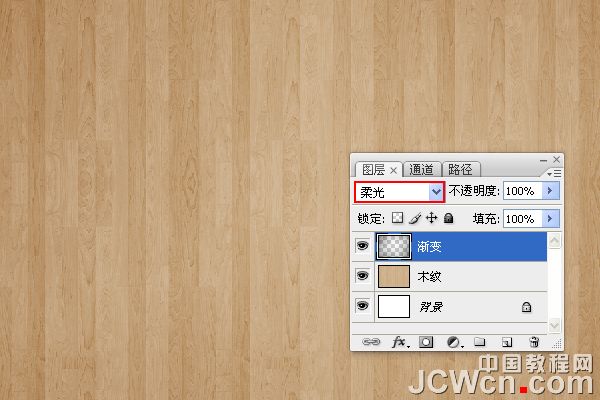
6、“渐变”图层的混合模式更改为柔光。
7、单击“图层”面板中的“创建新的填充或调整图层”图标,并选择色阶。
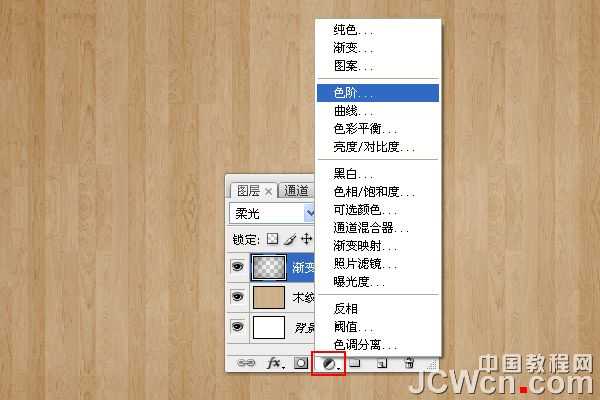
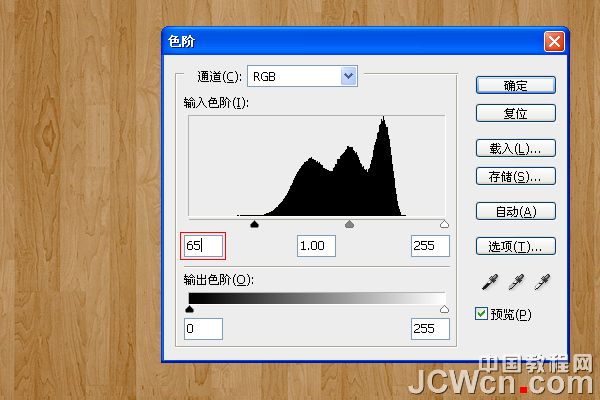
8、调整色阶面板数值,设置为65。 使背景变暗。
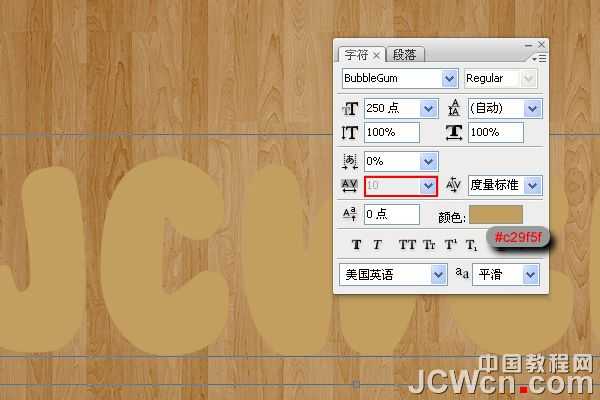
9、在图层面板上创建一个图层,选中工具面板中的横排文字工具,文本的颜色#c29f5f。 使用的字体是Bubblegum泡泡糖字体,大小为250像素。字体间距设置为 10,以避免重叠。
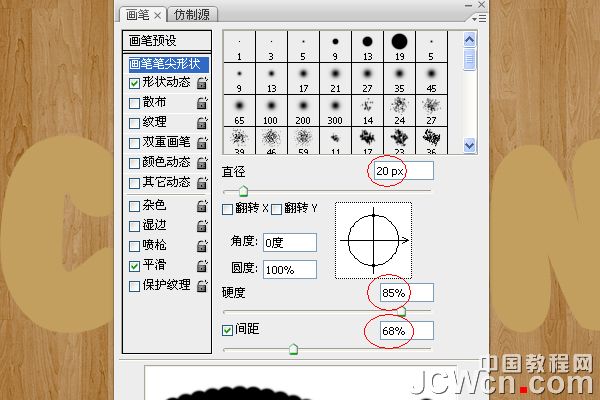
10、现在,我们设置下笔刷。 因此,打开画笔面板,并选择一个圆形硬刷。 设置画笔笔尖形状 ,大小设置为20,硬度85%,间距为68%。
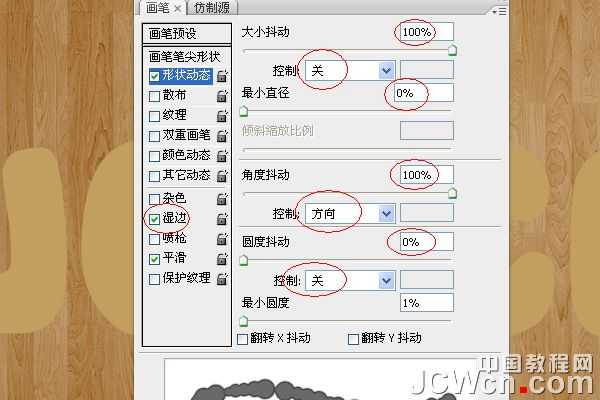
11、在形状动态 ,大小抖动为100%,其他的值如图所示。 此外,勾选湿边选项。
12、回到“图层”面板中,右键单击文字层,并选择“创建工作路径”。
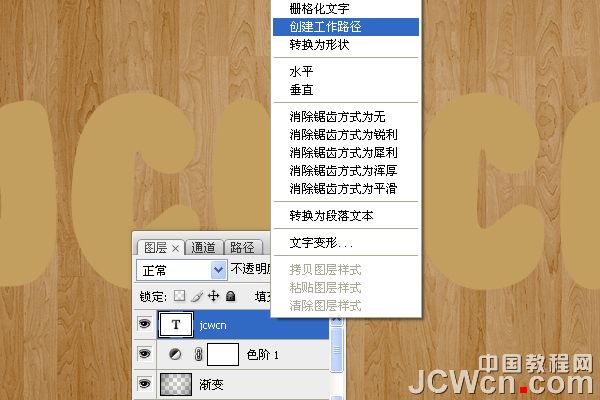
13、创建一个新图层,放置在文本层下面,并起名为“路径”。 设置前景色为#a06600并在工具面板上,选择路径选择工具。
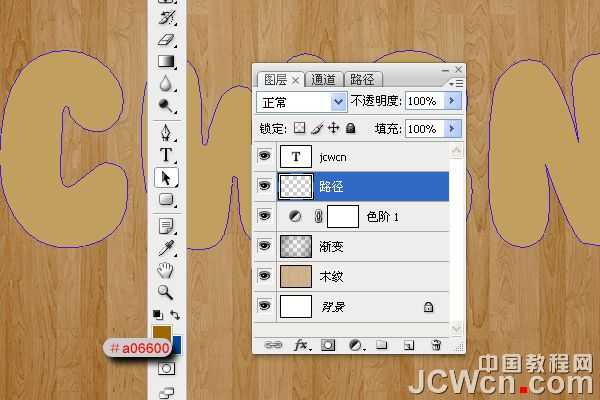
14、右键单击路径,选择描边路径。
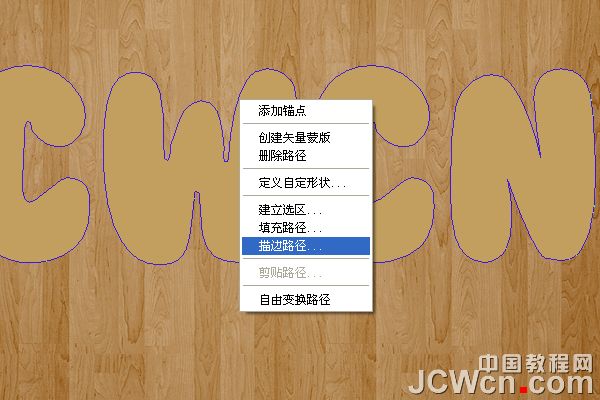
15、描边路径对话框中选择画笔。
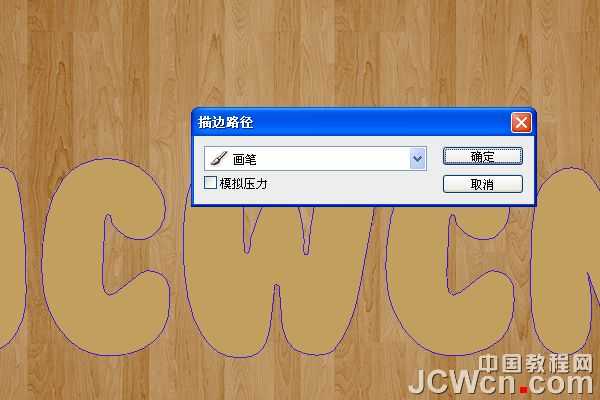
16、在路径图层中创建了JCWCN路径。


17、在JCWCN这个文字图层点击右键,在右键菜单中选择复制图层,建立JCWCN 副本,单击原始文字层旁边的眼睛图标,将眼睛勾选掉,使层的内容是无形的不显示。
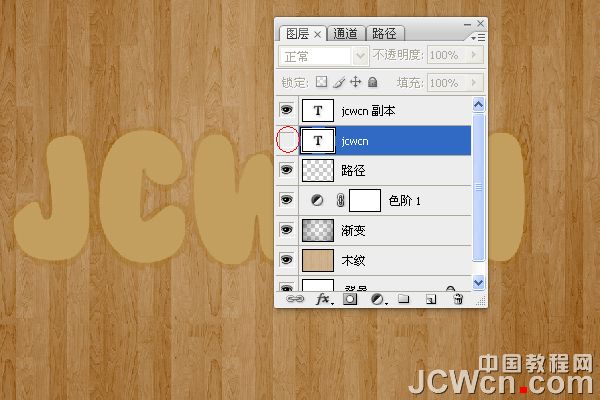
18、在JCWCN 副本图层上单击右键,选择栅格化文字。
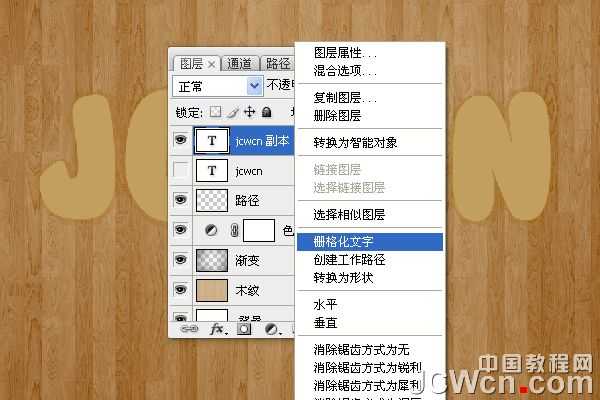
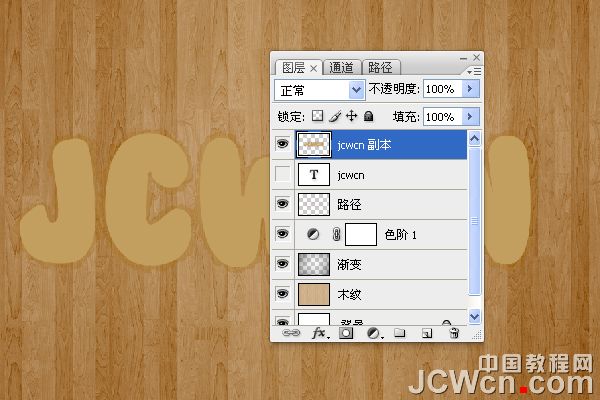
19、将文字层栅格化,这意味着你不能再修改文本,因此要确保你已经完成了所有的修改后在执行这一步。
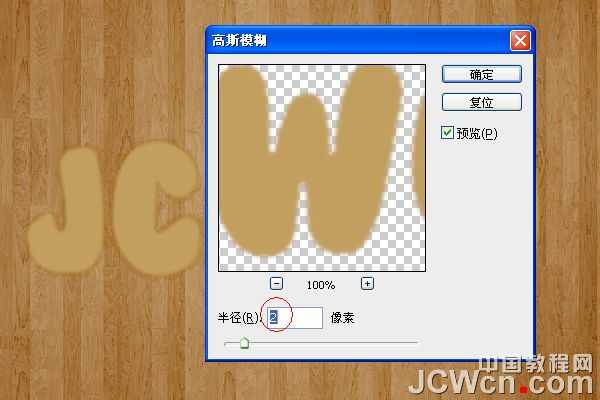
20、转到滤镜- >模糊- >高斯模糊 ,设置半径为2。
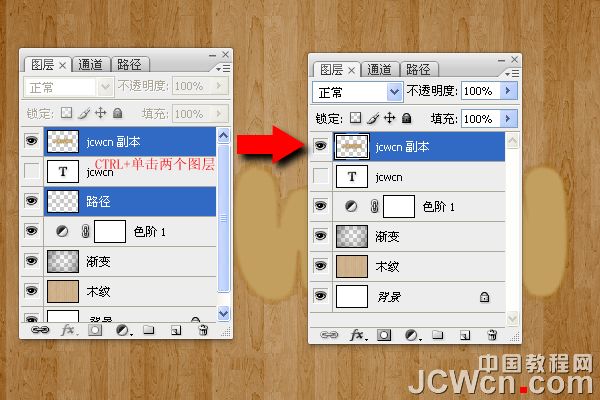
21、按Ctrl键,用鼠标依次点击“路径”图层和“JCWCN副本”图层,选中两个图层,然后去图层- >合并图层 ,(或按Ctrl+ E)。
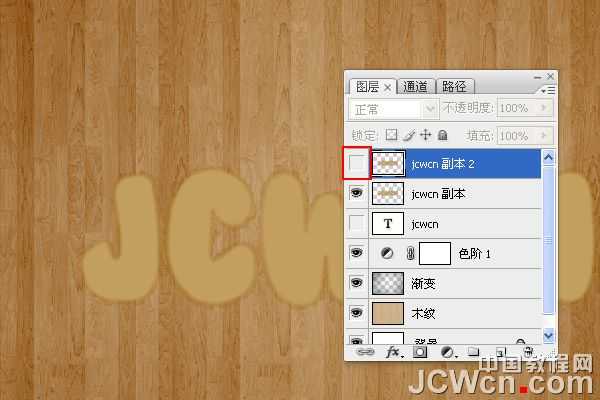
22、复制刚刚合并后的图层“JCWCN副本”图层,得到“JCWCN副本2”图层,然后按一下旁边的眼睛图标,副本2层,使其无形。
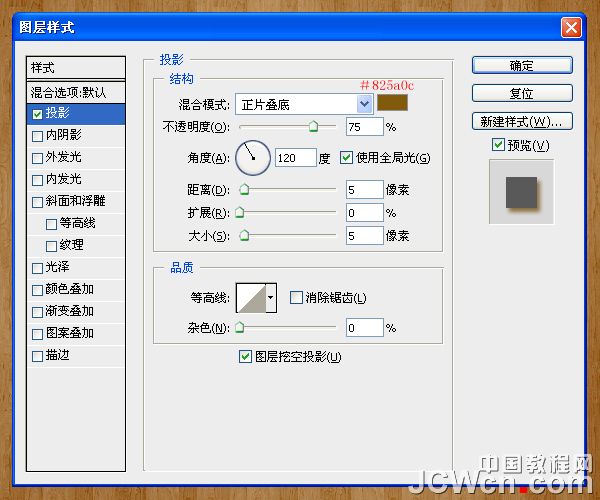
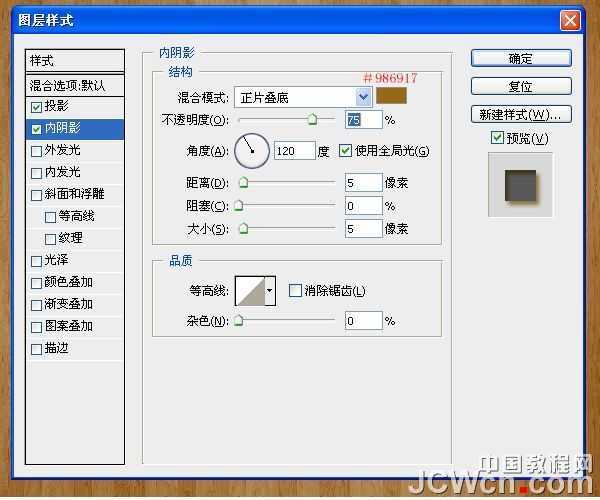
23、双击刚刚合并的图层“jcwcn 副本”,应用下面的图层样式。
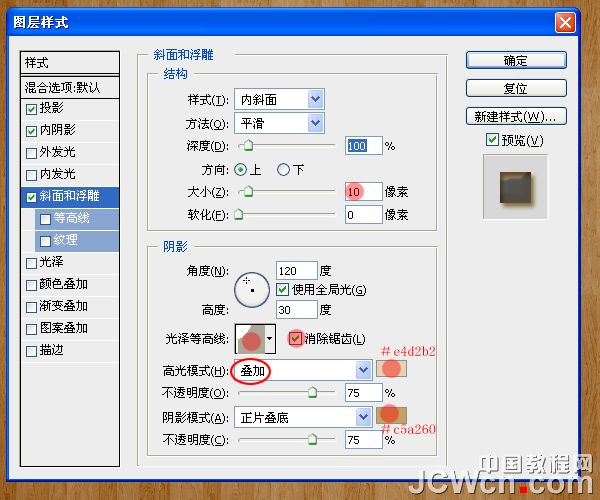
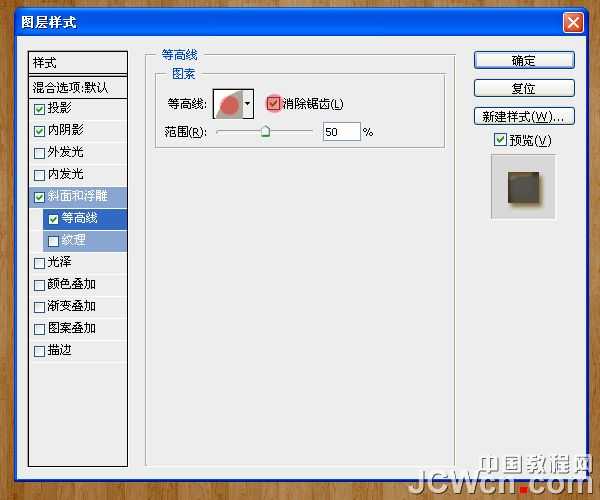
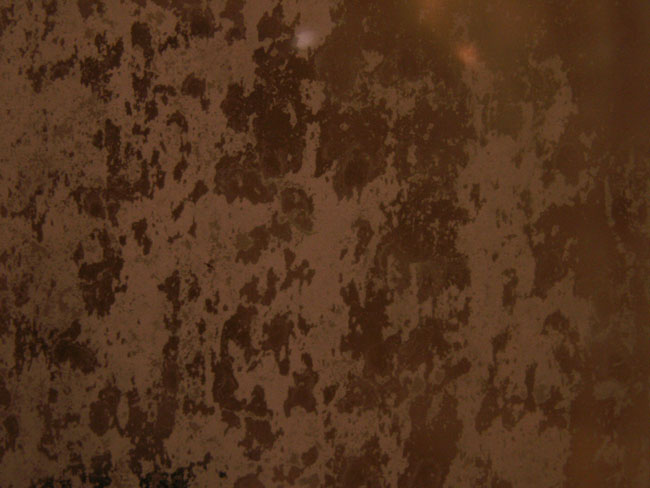
24、在Photoshop中打开“铁锈纹理.jpg”。调整图像大小到600X500, 进入编辑- >定义图案 ,随意起一个名字即可,我用的是素材的名字。
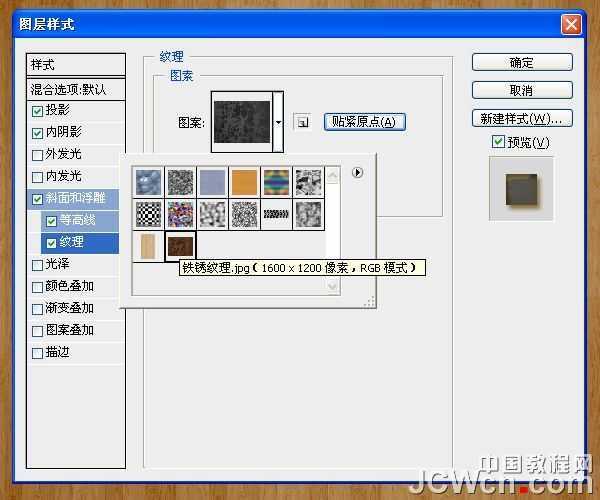
25、纹理:选择铁锈纹理,并改变的深度为100%。
26、看下这时候的效果。

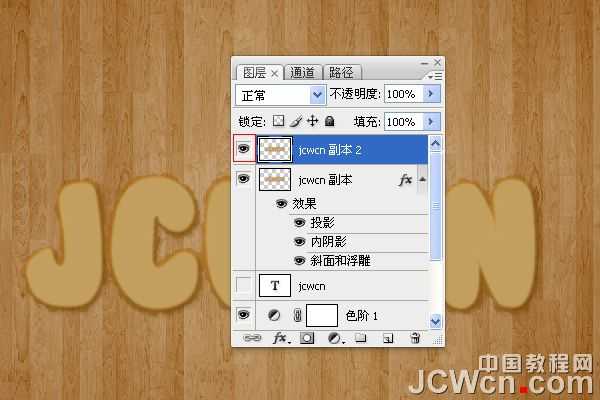
27、现在在图层面板上点击的最上面的“JCWCN副本2”图层的眼睛图标,使该层可见。
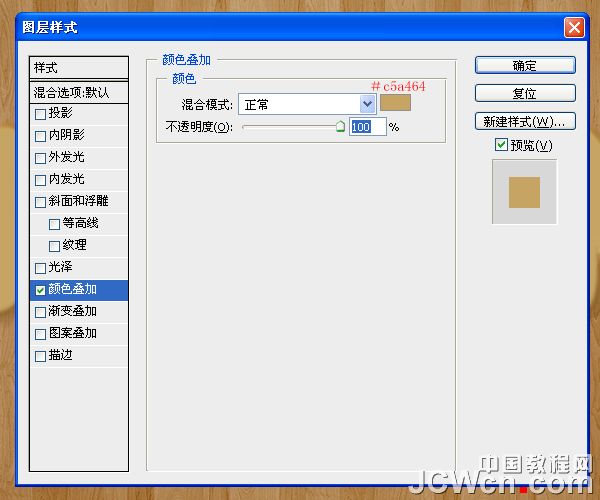
28、双击JCWCN副本2图层,在图层样式对话框中勾选应用颜色叠加 ,颜色设置为#c5a464。
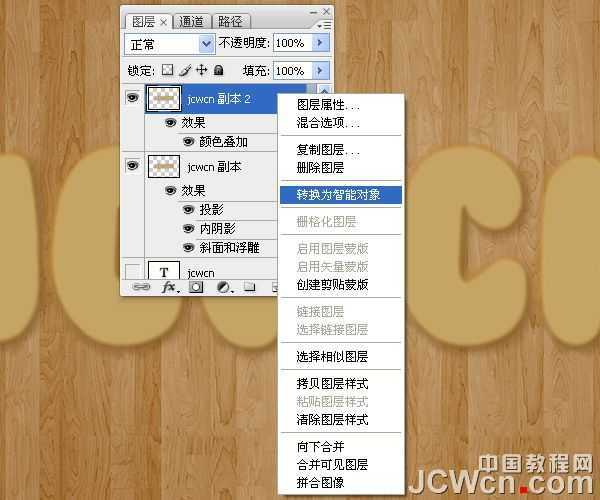
29、我们右键单击JCWCN副本2图层,在右键菜单中选择转换为智能对象。
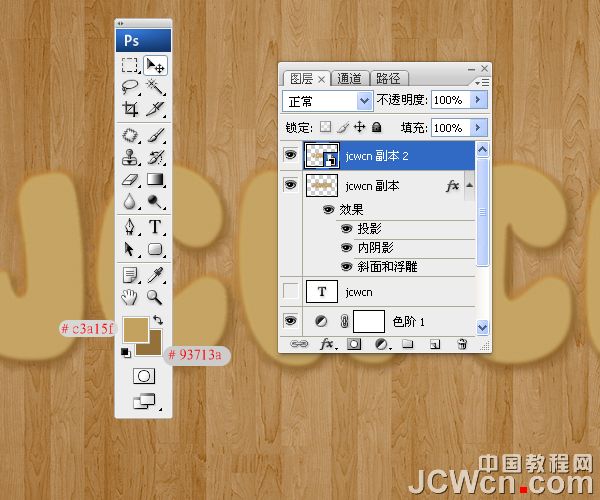
30、前景色设置为#c3a15f,背景颜色设置为#93713a。
31、滤镜- >素描- >网状 。浓度设置为10,前景色阶为10,背景色阶为20。
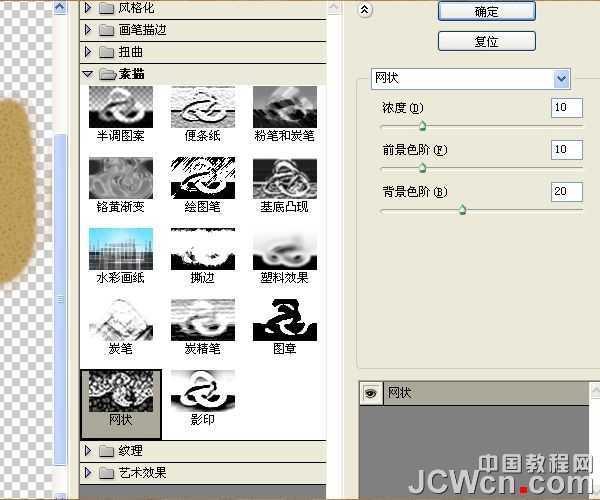

32、接下来,滤镜- >画笔描边- >墨水轮廓 。 描边长度设置为到10至17日左右,深色强度为0,光照强度为10。
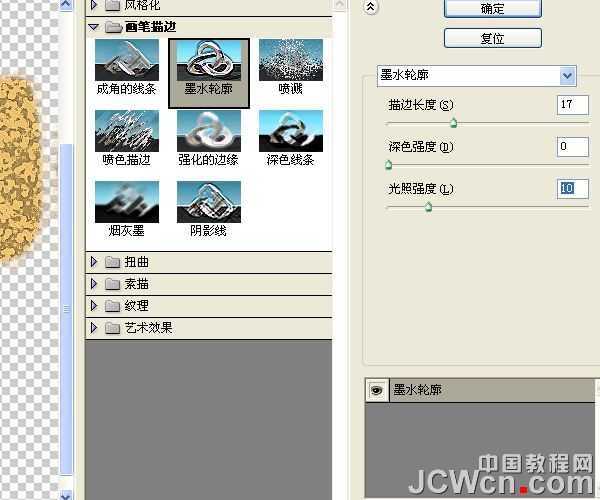

33、滤镜- >纹理- >龟裂缝 。 设置裂缝间距为15,裂缝深度6,裂缝亮度为10。
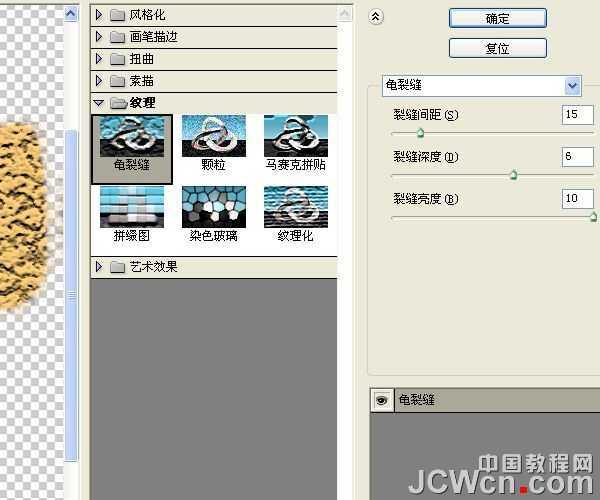

34、右键点击JCWCN副本2图层,选择栅格化图层。
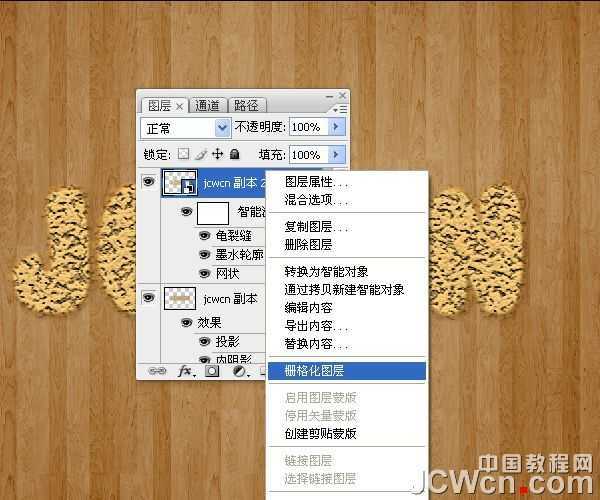
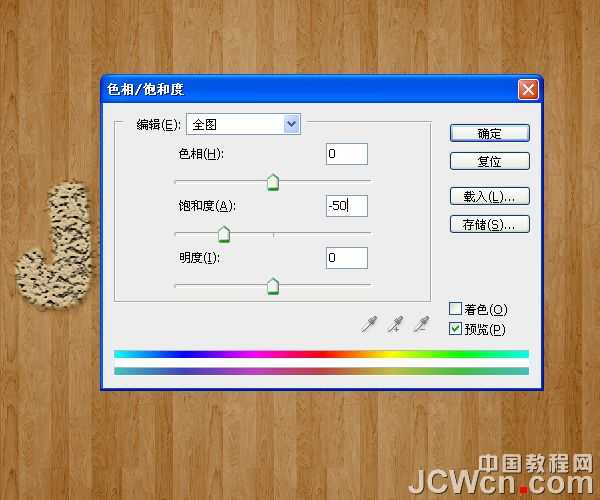
35、图像- >调整- >色相/饱和度 ,(或按Ctrl+ U),并改变的饱和值-50。
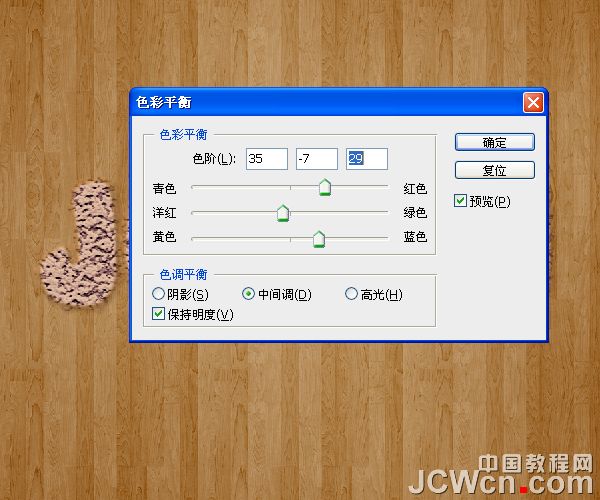
36、图像- >调整- >色彩平衡 ,(或按Ctrl+ B),改变颜色值为35,-7,和29。
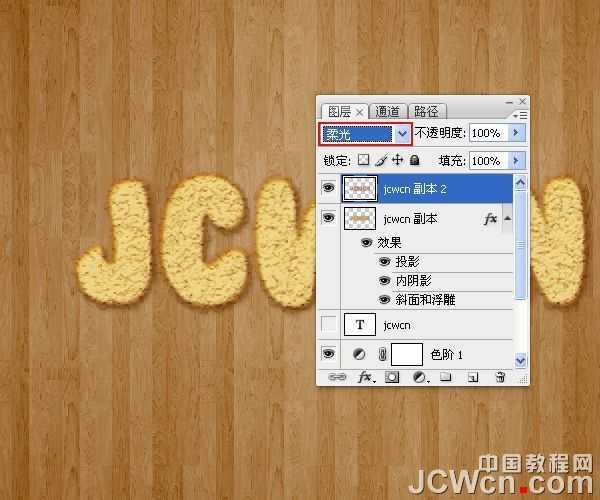
37、更改JCWCN副本2图层的混合模式为柔光。
上一页12 下一页 阅读全文

1、在Photoshop中打开木纹素材。 进入编辑- >定义图案 ,随意起一个名字即可,我用的是素材的名字。


2、转到文件- >新建 ,创建一个新的1150 × 768像素的文件。

3、在背景层之上创建一个新层,并起名为“木纹”。

4、选择油漆桶工具 ,并在顶部的“选项”栏中, 选择填充类型的模式,从模式下拉菜单中选择木纹。然后在木纹这个图层上使用用油漆桶工具。


5、“木纹”图层之上创建一个新层,并把它称为“渐变”。 选择渐变工具 ,设置前景色为黑色 ,并在选项栏上,选择“棱形渐变”前景到透明“渐变”,勾选反向框。 单击并拖动文档中心到任意一个角,创建渐变。


6、“渐变”图层的混合模式更改为柔光。

7、单击“图层”面板中的“创建新的填充或调整图层”图标,并选择色阶。

8、调整色阶面板数值,设置为65。 使背景变暗。

9、在图层面板上创建一个图层,选中工具面板中的横排文字工具,文本的颜色#c29f5f。 使用的字体是Bubblegum泡泡糖字体,大小为250像素。字体间距设置为 10,以避免重叠。

10、现在,我们设置下笔刷。 因此,打开画笔面板,并选择一个圆形硬刷。 设置画笔笔尖形状 ,大小设置为20,硬度85%,间距为68%。

11、在形状动态 ,大小抖动为100%,其他的值如图所示。 此外,勾选湿边选项。

12、回到“图层”面板中,右键单击文字层,并选择“创建工作路径”。

13、创建一个新图层,放置在文本层下面,并起名为“路径”。 设置前景色为#a06600并在工具面板上,选择路径选择工具。

14、右键单击路径,选择描边路径。

15、描边路径对话框中选择画笔。

16、在路径图层中创建了JCWCN路径。


17、在JCWCN这个文字图层点击右键,在右键菜单中选择复制图层,建立JCWCN 副本,单击原始文字层旁边的眼睛图标,将眼睛勾选掉,使层的内容是无形的不显示。

18、在JCWCN 副本图层上单击右键,选择栅格化文字。

19、将文字层栅格化,这意味着你不能再修改文本,因此要确保你已经完成了所有的修改后在执行这一步。

20、转到滤镜- >模糊- >高斯模糊 ,设置半径为2。

21、按Ctrl键,用鼠标依次点击“路径”图层和“JCWCN副本”图层,选中两个图层,然后去图层- >合并图层 ,(或按Ctrl+ E)。

22、复制刚刚合并后的图层“JCWCN副本”图层,得到“JCWCN副本2”图层,然后按一下旁边的眼睛图标,副本2层,使其无形。

23、双击刚刚合并的图层“jcwcn 副本”,应用下面的图层样式。


24、在Photoshop中打开“铁锈纹理.jpg”。调整图像大小到600X500, 进入编辑- >定义图案 ,随意起一个名字即可,我用的是素材的名字。

25、纹理:选择铁锈纹理,并改变的深度为100%。

26、看下这时候的效果。

27、现在在图层面板上点击的最上面的“JCWCN副本2”图层的眼睛图标,使该层可见。

28、双击JCWCN副本2图层,在图层样式对话框中勾选应用颜色叠加 ,颜色设置为#c5a464。

29、我们右键单击JCWCN副本2图层,在右键菜单中选择转换为智能对象。

30、前景色设置为#c3a15f,背景颜色设置为#93713a。

31、滤镜- >素描- >网状 。浓度设置为10,前景色阶为10,背景色阶为20。


32、接下来,滤镜- >画笔描边- >墨水轮廓 。 描边长度设置为到10至17日左右,深色强度为0,光照强度为10。


33、滤镜- >纹理- >龟裂缝 。 设置裂缝间距为15,裂缝深度6,裂缝亮度为10。


34、右键点击JCWCN副本2图层,选择栅格化图层。

35、图像- >调整- >色相/饱和度 ,(或按Ctrl+ U),并改变的饱和值-50。

36、图像- >调整- >色彩平衡 ,(或按Ctrl+ B),改变颜色值为35,-7,和29。

37、更改JCWCN副本2图层的混合模式为柔光。

上一页12 下一页 阅读全文
标签:
奶酪,饼干字
帝王谷资源网 Design By www.wdxyy.com
广告合作:本站广告合作请联系QQ:858582 申请时备注:广告合作(否则不回)
免责声明:本站文章均来自网站采集或用户投稿,网站不提供任何软件下载或自行开发的软件! 如有用户或公司发现本站内容信息存在侵权行为,请邮件告知! 858582#qq.com
免责声明:本站文章均来自网站采集或用户投稿,网站不提供任何软件下载或自行开发的软件! 如有用户或公司发现本站内容信息存在侵权行为,请邮件告知! 858582#qq.com
帝王谷资源网 Design By www.wdxyy.com
暂无评论...
更新日志
2025年02月19日
2025年02月19日
- 小骆驼-《草原狼2(蓝光CD)》[原抓WAV+CUE]
- 群星《欢迎来到我身边 电影原声专辑》[320K/MP3][105.02MB]
- 群星《欢迎来到我身边 电影原声专辑》[FLAC/分轨][480.9MB]
- 雷婷《梦里蓝天HQⅡ》 2023头版限量编号低速原抓[WAV+CUE][463M]
- 群星《2024好听新歌42》AI调整音效【WAV分轨】
- 王思雨-《思念陪着鸿雁飞》WAV
- 王思雨《喜马拉雅HQ》头版限量编号[WAV+CUE]
- 李健《无时无刻》[WAV+CUE][590M]
- 陈奕迅《酝酿》[WAV分轨][502M]
- 卓依婷《化蝶》2CD[WAV+CUE][1.1G]
- 群星《吉他王(黑胶CD)》[WAV+CUE]
- 齐秦《穿乐(穿越)》[WAV+CUE]
- 发烧珍品《数位CD音响测试-动向效果(九)》【WAV+CUE】
- 邝美云《邝美云精装歌集》[DSF][1.6G]
- 吕方《爱一回伤一回》[WAV+CUE][454M]
