帝王谷资源网 Design By www.wdxyy.com
最终效果

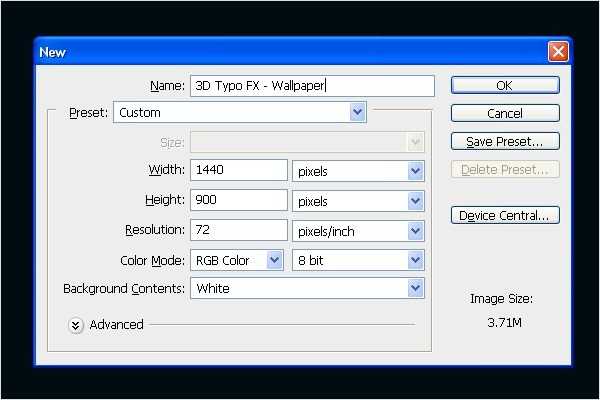
1、打开Photoshop。选择文件>新建或按Ctrl/Command+ N,我设置的大小为1440px(宽)× 900px(高)。
2、我们要在Illustrator中创建3D文本。首先,你需要在Illustrator中输入文本。我输入的文字是“FX”。打开Illustrator,选择文字工具,键入文字。输入字体更改为“ Hobo Std Medium ”。

3、更改文字的颜色。“F”我们使用蓝色(#094569),“X”使用深橙色(#AB7D1B)。你的图像看起来应该像下图。

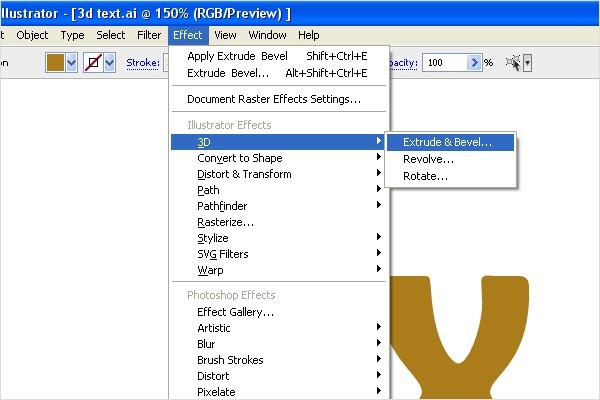
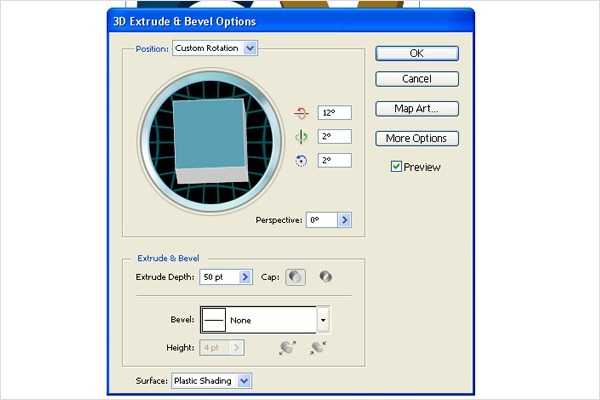
4、我们需要创建3D文本。去菜单>效果>3D>挤压与斜角...
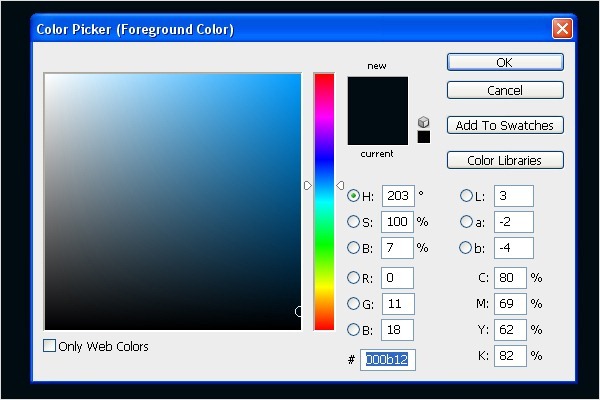
5、完成3D文字之后,回到Photoshop中,改变背景颜色为蓝色(#000b12)。
6、从Illustrator里复制文本并把它粘贴到Photoshop中。选择文本图层,右击它选择栅格化图层。

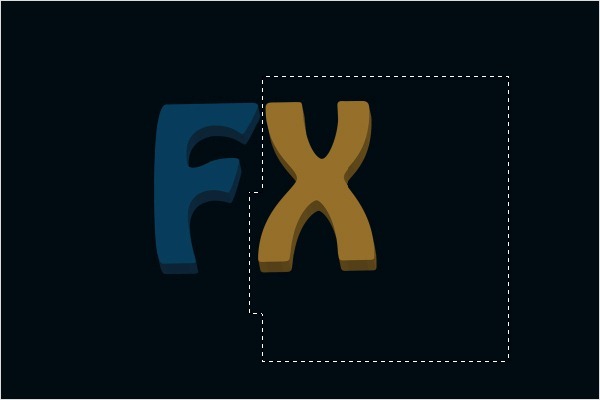
7、现在我们要把文本分成两部分。选择矩形选框工具(M),对字母“X”做选区。 按Ctrl + X剪切,Ctrl + V粘贴文本。对齐文本。
8、我们需要在文本中创建高光。从工具里选择减淡工具(O),按下图设置笔刷。
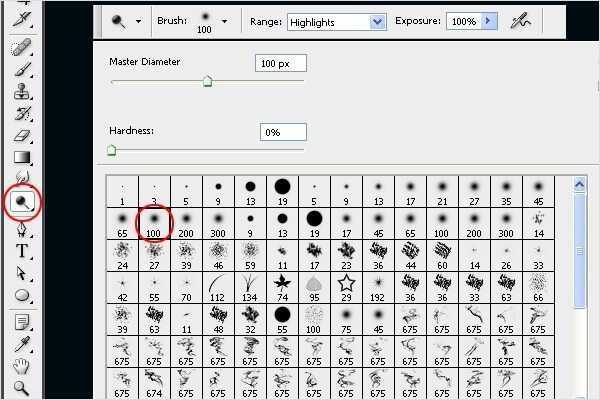
9、使用减淡工具涂抹需要高光的区域。你可以参照下图。

10、参照步骤9,按下图创建更多的高光。

11、现在我们要在相反的区域创建阴影。选择加深工具(O),描绘阴影。
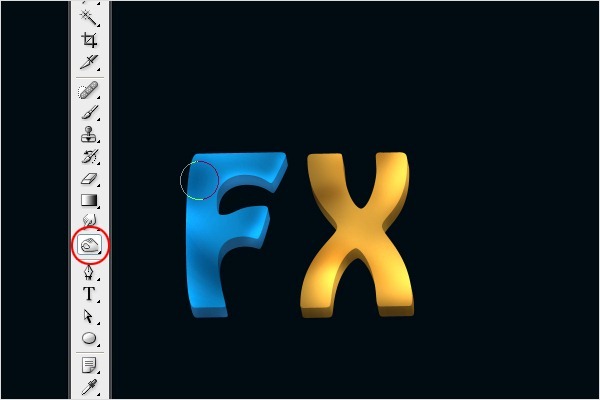
12、参照步骤11,按下图添加更多的阴影。

13、为了给文本添加更多的对比度,选择减淡工具(O)。增加画笔的大小为800px,然后在整个字母“F”上点击,再点击字母“X”,你会得到下图所示的效果。

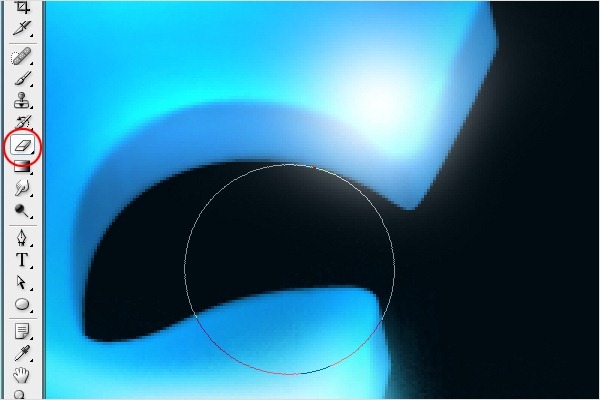
14、现在我们将添加一些点光使文字的边角更亮。选择画笔工具(B)。使用主直径为90px的柔软的圆形笔刷。选择白色为前景色,创建一个新层。在文字的边角里描绘。如下图:
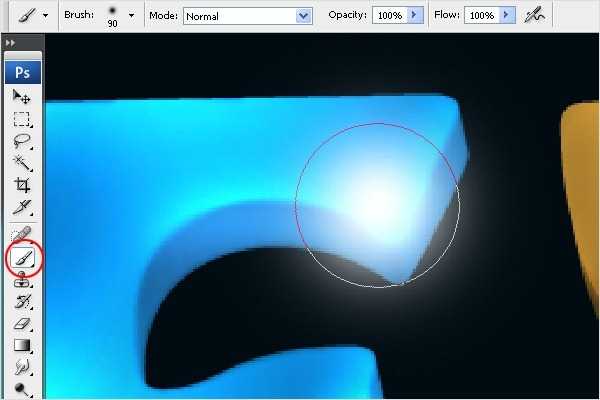
15、擦除那些不小心添加在背景上的光。
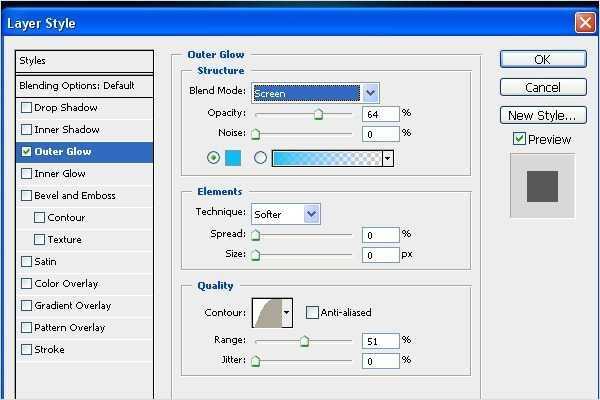
16、点击添加图层样式按钮。选择外发光选项,并按下图设置。点击OK。
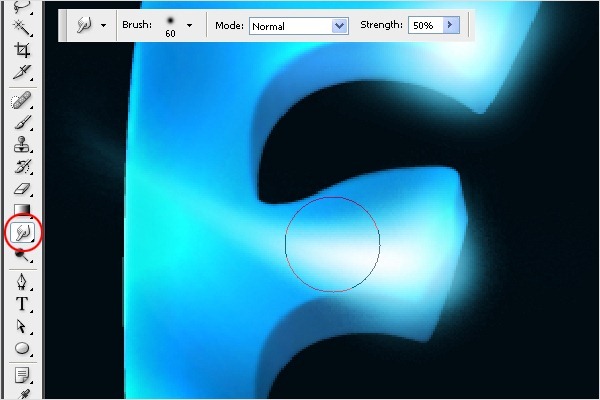
17、现在复制步骤14中创建的光。选择涂抹工具(R),从右至左拖动画笔,光就散布在文本上了。参照下面的图片就知道我的意思了。
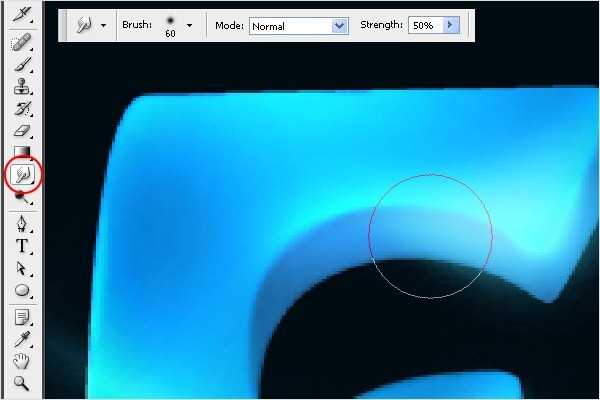
18、选择涂抹工具(R),在文本的边角拖动光。如图。

19、现在我们将在文字的边缘添加一些光。选择画笔工具(B)。使用主直径90px的柔软的圆形笔刷。创建一个新层,按下图在边缘周围描绘光。
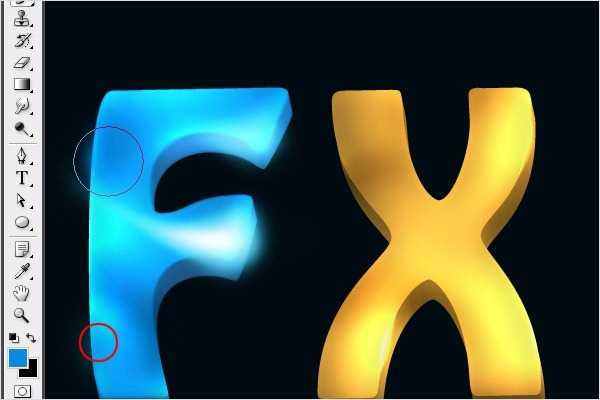
20、在这一步,我们将把焦点放在字母“X”上。用与步骤14和15同样的方式制作点光。参考下图。
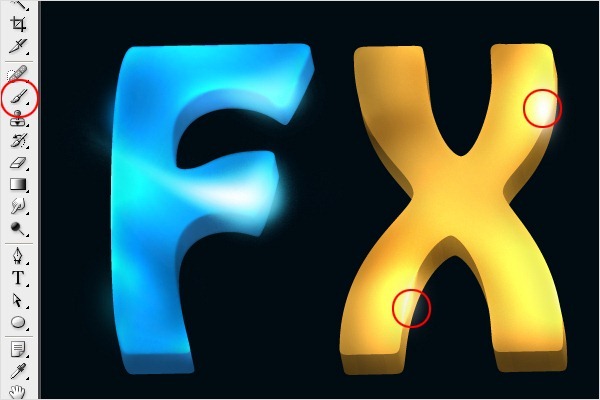
上一页12 3 下一页 阅读全文

1、打开Photoshop。选择文件>新建或按Ctrl/Command+ N,我设置的大小为1440px(宽)× 900px(高)。

2、我们要在Illustrator中创建3D文本。首先,你需要在Illustrator中输入文本。我输入的文字是“FX”。打开Illustrator,选择文字工具,键入文字。输入字体更改为“ Hobo Std Medium ”。

3、更改文字的颜色。“F”我们使用蓝色(#094569),“X”使用深橙色(#AB7D1B)。你的图像看起来应该像下图。

4、我们需要创建3D文本。去菜单>效果>3D>挤压与斜角...


5、完成3D文字之后,回到Photoshop中,改变背景颜色为蓝色(#000b12)。

6、从Illustrator里复制文本并把它粘贴到Photoshop中。选择文本图层,右击它选择栅格化图层。

7、现在我们要把文本分成两部分。选择矩形选框工具(M),对字母“X”做选区。 按Ctrl + X剪切,Ctrl + V粘贴文本。对齐文本。

8、我们需要在文本中创建高光。从工具里选择减淡工具(O),按下图设置笔刷。

9、使用减淡工具涂抹需要高光的区域。你可以参照下图。

10、参照步骤9,按下图创建更多的高光。

11、现在我们要在相反的区域创建阴影。选择加深工具(O),描绘阴影。

12、参照步骤11,按下图添加更多的阴影。

13、为了给文本添加更多的对比度,选择减淡工具(O)。增加画笔的大小为800px,然后在整个字母“F”上点击,再点击字母“X”,你会得到下图所示的效果。

14、现在我们将添加一些点光使文字的边角更亮。选择画笔工具(B)。使用主直径为90px的柔软的圆形笔刷。选择白色为前景色,创建一个新层。在文字的边角里描绘。如下图:

15、擦除那些不小心添加在背景上的光。

16、点击添加图层样式按钮。选择外发光选项,并按下图设置。点击OK。

17、现在复制步骤14中创建的光。选择涂抹工具(R),从右至左拖动画笔,光就散布在文本上了。参照下面的图片就知道我的意思了。

18、选择涂抹工具(R),在文本的边角拖动光。如图。


19、现在我们将在文字的边缘添加一些光。选择画笔工具(B)。使用主直径90px的柔软的圆形笔刷。创建一个新层,按下图在边缘周围描绘光。

20、在这一步,我们将把焦点放在字母“X”上。用与步骤14和15同样的方式制作点光。参考下图。

上一页12 3 下一页 阅读全文
标签:
潮流,立体字
帝王谷资源网 Design By www.wdxyy.com
广告合作:本站广告合作请联系QQ:858582 申请时备注:广告合作(否则不回)
免责声明:本站文章均来自网站采集或用户投稿,网站不提供任何软件下载或自行开发的软件! 如有用户或公司发现本站内容信息存在侵权行为,请邮件告知! 858582#qq.com
免责声明:本站文章均来自网站采集或用户投稿,网站不提供任何软件下载或自行开发的软件! 如有用户或公司发现本站内容信息存在侵权行为,请邮件告知! 858582#qq.com
帝王谷资源网 Design By www.wdxyy.com
暂无评论...
更新日志
2025年02月19日
2025年02月19日
- 小骆驼-《草原狼2(蓝光CD)》[原抓WAV+CUE]
- 群星《欢迎来到我身边 电影原声专辑》[320K/MP3][105.02MB]
- 群星《欢迎来到我身边 电影原声专辑》[FLAC/分轨][480.9MB]
- 雷婷《梦里蓝天HQⅡ》 2023头版限量编号低速原抓[WAV+CUE][463M]
- 群星《2024好听新歌42》AI调整音效【WAV分轨】
- 王思雨-《思念陪着鸿雁飞》WAV
- 王思雨《喜马拉雅HQ》头版限量编号[WAV+CUE]
- 李健《无时无刻》[WAV+CUE][590M]
- 陈奕迅《酝酿》[WAV分轨][502M]
- 卓依婷《化蝶》2CD[WAV+CUE][1.1G]
- 群星《吉他王(黑胶CD)》[WAV+CUE]
- 齐秦《穿乐(穿越)》[WAV+CUE]
- 发烧珍品《数位CD音响测试-动向效果(九)》【WAV+CUE】
- 邝美云《邝美云精装歌集》[DSF][1.6G]
- 吕方《爱一回伤一回》[WAV+CUE][454M]
