帝王谷资源网 Design By www.wdxyy.com
最终效果
1、新建一个600 * 600像素的文件,背景填充白色。新建一个图层,用钢笔勾出猴子的轮廓,转为选区如图1,然后填充颜色:#AC7700,效果如图2。
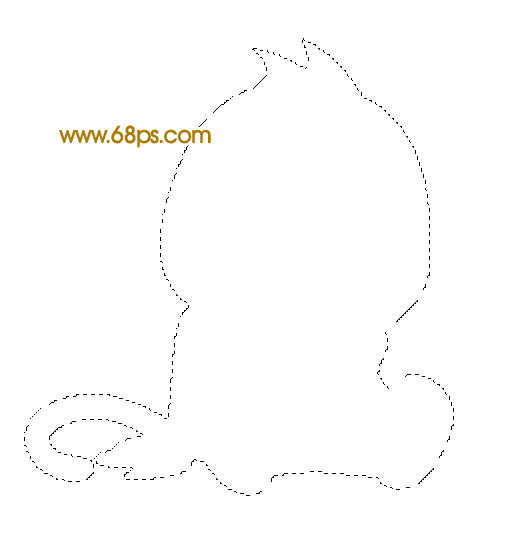
<图1>

<图2> 2、用钢笔工具把猴子的头部选取出来,如图3,按Ctrl + J 复制到新的图层。

<图3>
3、调出猴子头部选取,执行:选择 > 修改 > 收缩,数值为20,确定后按Ctrl + Alt + D 羽化15个像素,然后新建一个图层填充颜色:#B78700,效果如图5。
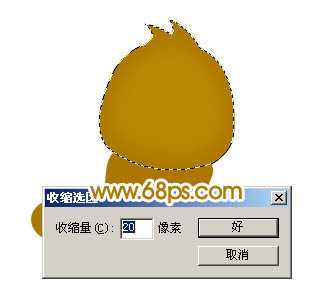
<图4>

<图5> 4、新建一个图层,用钢笔勾出图6所示的选区,填充颜色:#D2B565,取消选区后加上图层蒙版,用黑色画笔把边缘部分涂掉,效果如图7。

<图6>

<图7>
5、新建一个图层,用钢笔勾出猴子脸部的选区,如图8,拉上图9所示的径向渐变色,效果如图10。

<图8>

<图9>

<图10> 6、新建一个图层,用钢笔勾图11所示的选区,填充白色。加上图层蒙版把底部涂出透明度效果,效果如图12。

<图11>

<图12>
7、新建一个图层,用椭圆选框工具拉一个小的正圆,填充黑色,然后用白色画笔点上高光,另一只眼睛的制作方法相同,效果如下图。

<图13> 上一页12 下一页 阅读全文
1、新建一个600 * 600像素的文件,背景填充白色。新建一个图层,用钢笔勾出猴子的轮廓,转为选区如图1,然后填充颜色:#AC7700,效果如图2。
<图1>
<图2> 2、用钢笔工具把猴子的头部选取出来,如图3,按Ctrl + J 复制到新的图层。
<图3>
3、调出猴子头部选取,执行:选择 > 修改 > 收缩,数值为20,确定后按Ctrl + Alt + D 羽化15个像素,然后新建一个图层填充颜色:#B78700,效果如图5。
<图4>
<图5> 4、新建一个图层,用钢笔勾出图6所示的选区,填充颜色:#D2B565,取消选区后加上图层蒙版,用黑色画笔把边缘部分涂掉,效果如图7。
<图6>
<图7>
5、新建一个图层,用钢笔勾出猴子脸部的选区,如图8,拉上图9所示的径向渐变色,效果如图10。
<图8>
<图9>
<图10> 6、新建一个图层,用钢笔勾图11所示的选区,填充白色。加上图层蒙版把底部涂出透明度效果,效果如图12。
<图11>
<图12>
7、新建一个图层,用椭圆选框工具拉一个小的正圆,填充黑色,然后用白色画笔点上高光,另一只眼睛的制作方法相同,效果如下图。
<图13> 上一页12 下一页 阅读全文
标签:
卡通猴子
帝王谷资源网 Design By www.wdxyy.com
广告合作:本站广告合作请联系QQ:858582 申请时备注:广告合作(否则不回)
免责声明:本站文章均来自网站采集或用户投稿,网站不提供任何软件下载或自行开发的软件! 如有用户或公司发现本站内容信息存在侵权行为,请邮件告知! 858582#qq.com
免责声明:本站文章均来自网站采集或用户投稿,网站不提供任何软件下载或自行开发的软件! 如有用户或公司发现本站内容信息存在侵权行为,请邮件告知! 858582#qq.com
帝王谷资源网 Design By www.wdxyy.com
暂无评论...
更新日志
2025年02月19日
2025年02月19日
- 小骆驼-《草原狼2(蓝光CD)》[原抓WAV+CUE]
- 群星《欢迎来到我身边 电影原声专辑》[320K/MP3][105.02MB]
- 群星《欢迎来到我身边 电影原声专辑》[FLAC/分轨][480.9MB]
- 雷婷《梦里蓝天HQⅡ》 2023头版限量编号低速原抓[WAV+CUE][463M]
- 群星《2024好听新歌42》AI调整音效【WAV分轨】
- 王思雨-《思念陪着鸿雁飞》WAV
- 王思雨《喜马拉雅HQ》头版限量编号[WAV+CUE]
- 李健《无时无刻》[WAV+CUE][590M]
- 陈奕迅《酝酿》[WAV分轨][502M]
- 卓依婷《化蝶》2CD[WAV+CUE][1.1G]
- 群星《吉他王(黑胶CD)》[WAV+CUE]
- 齐秦《穿乐(穿越)》[WAV+CUE]
- 发烧珍品《数位CD音响测试-动向效果(九)》【WAV+CUE】
- 邝美云《邝美云精装歌集》[DSF][1.6G]
- 吕方《爱一回伤一回》[WAV+CUE][454M]