帝王谷资源网 Design By www.wdxyy.com
我们先来看看最终的效果图吧:

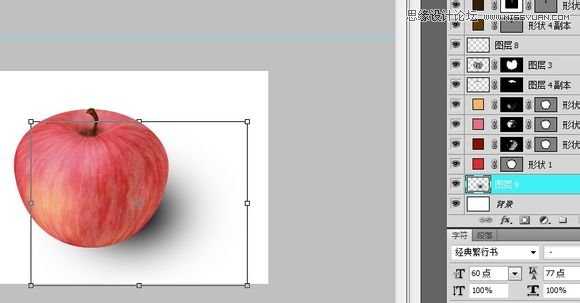
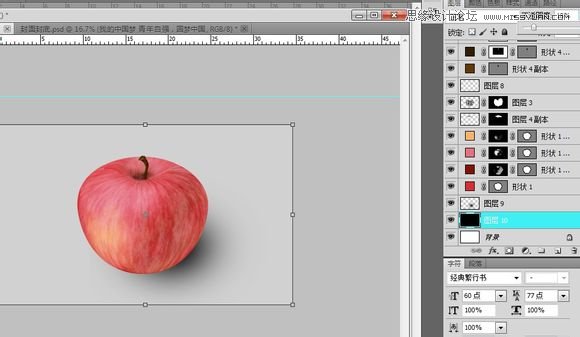
具体的绘制步骤如下:
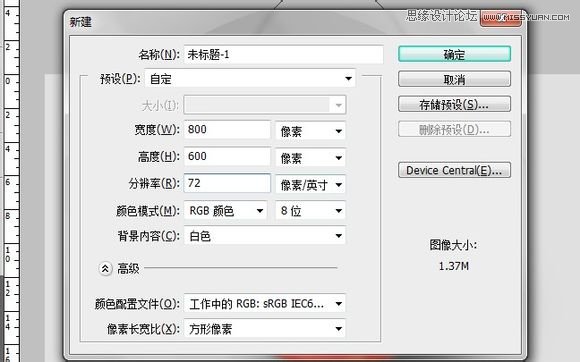
新建第一不都知道的
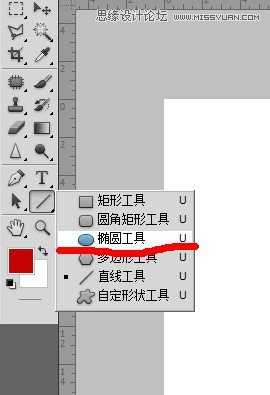
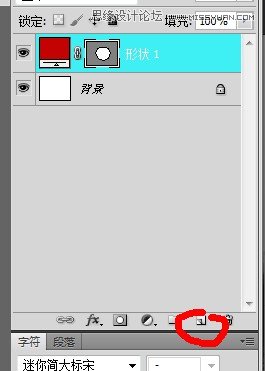
选择工具中的椭圆工具。。也可以用快捷键u直接召唤
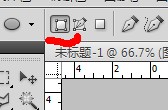
忘了提醒左上角是这样的哦
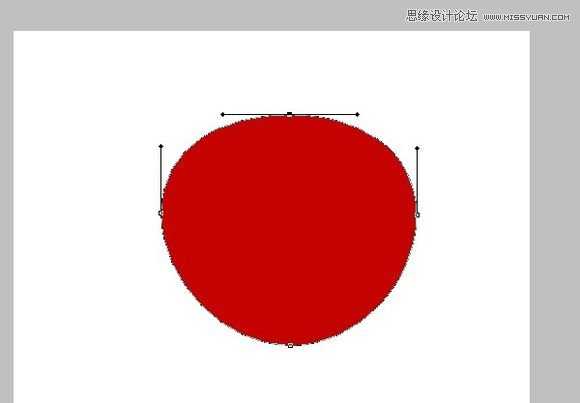
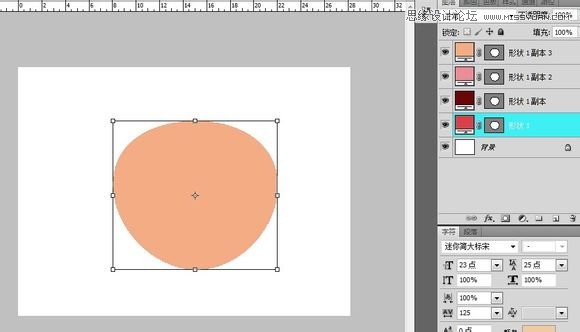
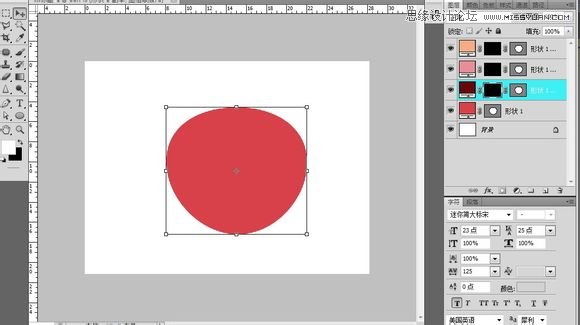
用键盘的A建切换到路径选择工具选中最上面的锚点将它往下压弄出一个类似苹果外形的图
拖住形状1复制出三个同样的图层
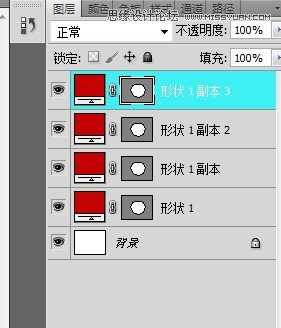
同样步奏分别选出苹果的亮部、暗部和中间色

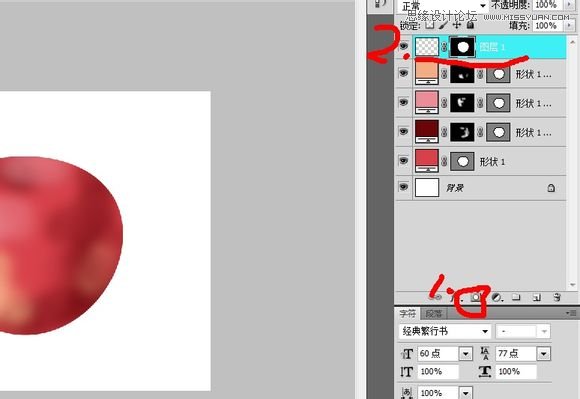
1.新建一个图成蒙版,2.按住ctrl+删除键或alt+删除(看你的黑色是在前景色还是在下面)键填充黑色
同样将宁外两图层上蒙版填充。。最后只可以看到你的中间色

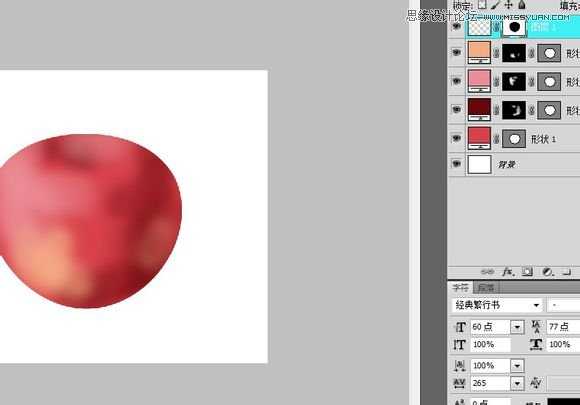
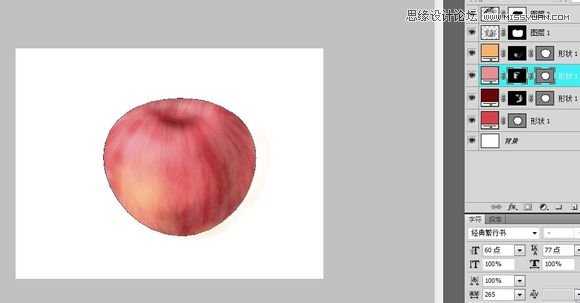
选中亮部颜色蒙版切换到画笔工具 颜色换为白色擦出苹果的亮部同样擦出暗部
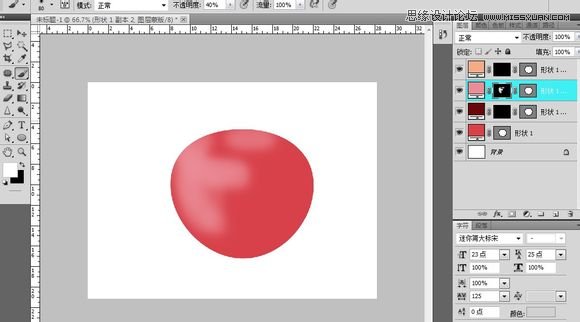
通过不断的调整成了这样(这个要自己掌控。。在蒙版里面用黑色和白色不断的调透明度什么的擦出来的)
同样的方法擦出苹果泛黄的部分
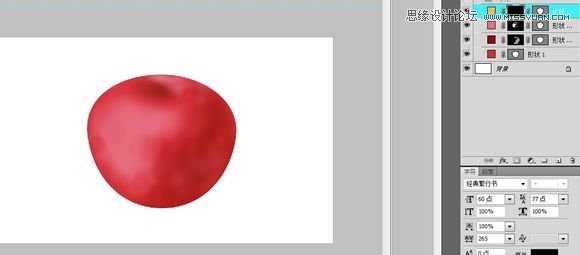
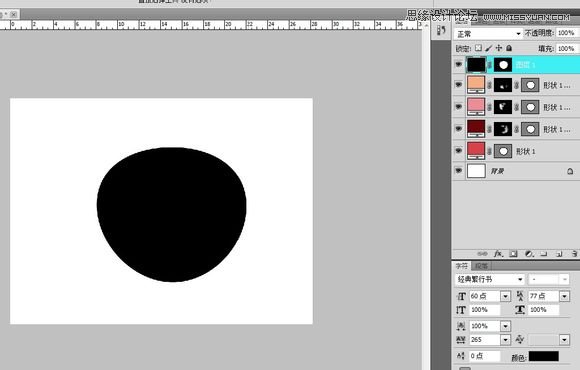
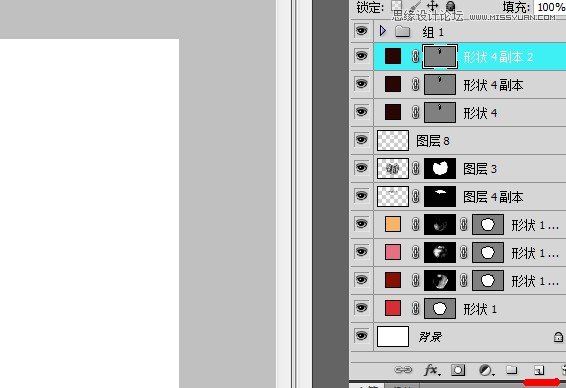
按住传统ctrl建鼠标同时点击画红色处的矢量图。会出现苹果的外形选区然后新建一个图层
然后点击1处。就会出现2出的效果我弄错了sorry啊。。。应该是选中苹果外形后按下ctrl+shift+i反选在新建图层再加蒙版
在图层上填充黑色。。效果如图
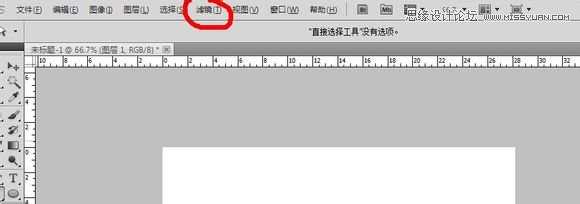
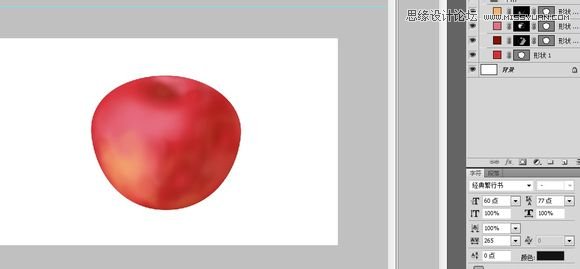
然后选择滤镜里面的-渲染 -纤维
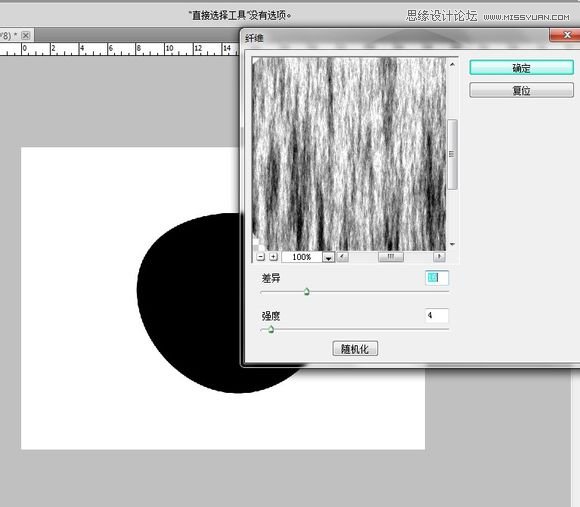
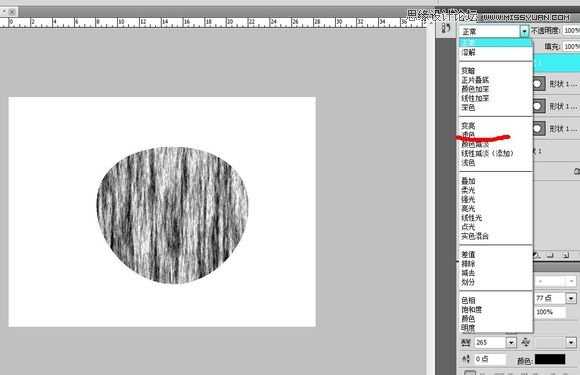
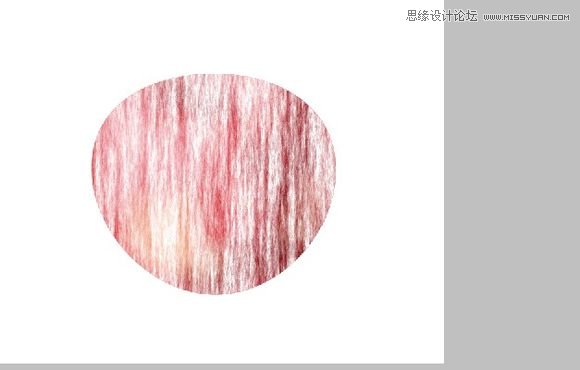
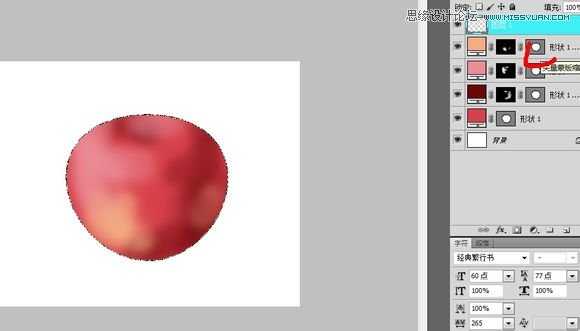
我这是选中苹果的外形然后反选将多余的纤维给删了。将图层1的不透明度调到23%,然后在按住ctrl+t右键变形通过网格自己拉成这样的

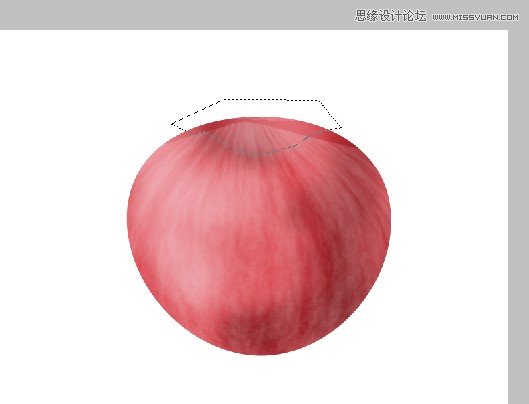
通过多边形选择工具选出苹果应该凹进去的部分然后将那部分的纤维减去(选中后按删除键就可以了)没有时间慢慢修拉的有点丑勿怪

新建一个图层用画笔颜色黑色在苹果凹进去的地方打个暗部
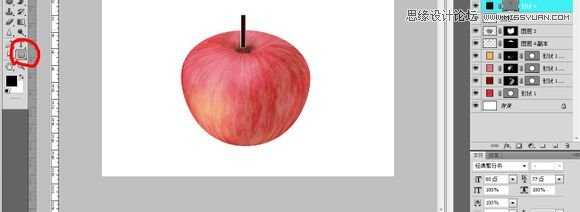
用巨型的矢量工具拉出一个长方形做苹果柄P切换到刚笔工具在那个巨型上添加几个锚点

切换到直接选择工具拖动锚点让它的形状更像苹果柄

复制两个同样的图层。
同画苹果是一样分别形状的颜色改为柄的亮部、暗部、中间色。。然后上蒙版
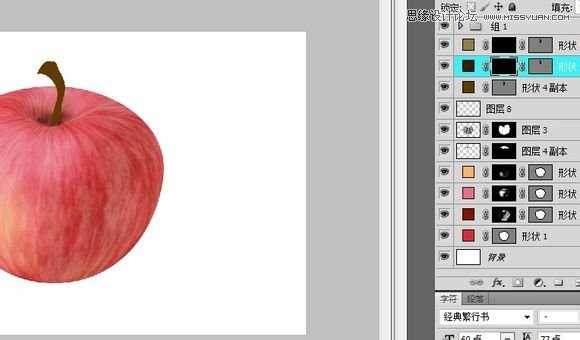
通过擦蒙版擦出苹果柄的明暗

之后新建一个图层用画笔工具点一下(用来做苹果的阴影)

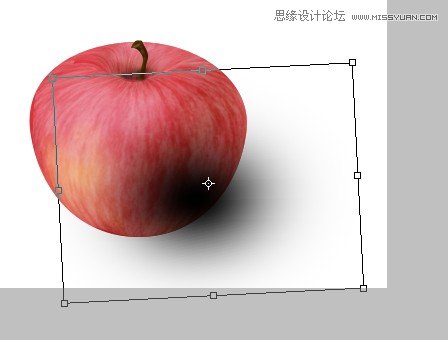
通过旋转收缩什么的使形状更像影子
将影子的那一层图层拖到苹果的下面在背景层上新建一层图层填充黑色。。然后调节透明度使变成灰色(当然你也可以直接填充灰色)
这样就完工啦
具体的绘制步骤如下:
新建第一不都知道的
选择工具中的椭圆工具。。也可以用快捷键u直接召唤
忘了提醒左上角是这样的哦
用键盘的A建切换到路径选择工具选中最上面的锚点将它往下压弄出一个类似苹果外形的图
拖住形状1复制出三个同样的图层
同样步奏分别选出苹果的亮部、暗部和中间色
1.新建一个图成蒙版,2.按住ctrl+删除键或alt+删除(看你的黑色是在前景色还是在下面)键填充黑色
同样将宁外两图层上蒙版填充。。最后只可以看到你的中间色
选中亮部颜色蒙版切换到画笔工具 颜色换为白色擦出苹果的亮部同样擦出暗部
通过不断的调整成了这样(这个要自己掌控。。在蒙版里面用黑色和白色不断的调透明度什么的擦出来的)
同样的方法擦出苹果泛黄的部分
按住传统ctrl建鼠标同时点击画红色处的矢量图。会出现苹果的外形选区然后新建一个图层
然后点击1处。就会出现2出的效果我弄错了sorry啊。。。应该是选中苹果外形后按下ctrl+shift+i反选在新建图层再加蒙版
在图层上填充黑色。。效果如图
然后选择滤镜里面的-渲染 -纤维
我这是选中苹果的外形然后反选将多余的纤维给删了。将图层1的不透明度调到23%,然后在按住ctrl+t右键变形通过网格自己拉成这样的
通过多边形选择工具选出苹果应该凹进去的部分然后将那部分的纤维减去(选中后按删除键就可以了)没有时间慢慢修拉的有点丑勿怪
新建一个图层用画笔颜色黑色在苹果凹进去的地方打个暗部
用巨型的矢量工具拉出一个长方形做苹果柄P切换到刚笔工具在那个巨型上添加几个锚点
切换到直接选择工具拖动锚点让它的形状更像苹果柄
复制两个同样的图层。
同画苹果是一样分别形状的颜色改为柄的亮部、暗部、中间色。。然后上蒙版
通过擦蒙版擦出苹果柄的明暗
之后新建一个图层用画笔工具点一下(用来做苹果的阴影)
通过旋转收缩什么的使形状更像影子
将影子的那一层图层拖到苹果的下面在背景层上新建一层图层填充黑色。。然后调节透明度使变成灰色(当然你也可以直接填充灰色)
这样就完工啦
标签:
立体,红富士
帝王谷资源网 Design By www.wdxyy.com
广告合作:本站广告合作请联系QQ:858582 申请时备注:广告合作(否则不回)
免责声明:本站文章均来自网站采集或用户投稿,网站不提供任何软件下载或自行开发的软件! 如有用户或公司发现本站内容信息存在侵权行为,请邮件告知! 858582#qq.com
免责声明:本站文章均来自网站采集或用户投稿,网站不提供任何软件下载或自行开发的软件! 如有用户或公司发现本站内容信息存在侵权行为,请邮件告知! 858582#qq.com
帝王谷资源网 Design By www.wdxyy.com
暂无评论...
苹果官宣WWDC 2024!预计会有大批AI功能 - 2025/2/22
3月27日消息,苹果宣布2024年全球开发者大会(WWDC)将于6月10日至6月14日举行,巧合的是,这次大会与端午假期重合。
苹果官方表示:
在线参加 Apple 每年规模最大的开发者盛会。亲眼见证 Apple 最新平台、技术和工具的发布。了解如何创建和改进你的 App 和游戏。与 Apple 设计师和工程师互动交流,与全球开发者社区建立联系。以上活动均免费在线举行。
探索各种新的工具、框架和功能,助力你打造出理想的 App 和游戏。通过视频讲座学习新技能,与 Apple 专家进行一对一会面,以推进你的项目,完善你的构思。
Swift Student Challenge 旨在支持和鼓舞下一代开发者、创作者和企业家。太平洋时间 3 月 28 日,我们将公布今年的获奖者名单。获奖者将有资格参加在 Apple Park 举办的特别活动。我们还会选出 50 名杰出获胜者,他们将受邀前往库比提诺,获得为期三天的非凡体验,包括参加 Apple Park 的特别活动。
RTX 5090要首发 性能要翻倍!三星展示GDDR7显存
三星在GTC上展示了专为下一代游戏GPU设计的GDDR7内存。
首次推出的GDDR7内存模块密度为16GB,每个模块容量为2GB。其速度预设为32 Gbps(PAM3),但也可以降至28 Gbps,以提高产量和初始阶段的整体性能和成本效益。
据三星表示,GDDR7内存的能效将提高20%,同时工作电压仅为1.1V,低于标准的1.2V。通过采用更新的封装材料和优化的电路设计,使得在高速运行时的发热量降低,GDDR7的热阻比GDDR6降低了70%。
更新日志
2025年02月22日
2025年02月22日
- 小骆驼-《草原狼2(蓝光CD)》[原抓WAV+CUE]
- 群星《欢迎来到我身边 电影原声专辑》[320K/MP3][105.02MB]
- 群星《欢迎来到我身边 电影原声专辑》[FLAC/分轨][480.9MB]
- 雷婷《梦里蓝天HQⅡ》 2023头版限量编号低速原抓[WAV+CUE][463M]
- 群星《2024好听新歌42》AI调整音效【WAV分轨】
- 王思雨-《思念陪着鸿雁飞》WAV
- 王思雨《喜马拉雅HQ》头版限量编号[WAV+CUE]
- 李健《无时无刻》[WAV+CUE][590M]
- 陈奕迅《酝酿》[WAV分轨][502M]
- 卓依婷《化蝶》2CD[WAV+CUE][1.1G]
- 群星《吉他王(黑胶CD)》[WAV+CUE]
- 齐秦《穿乐(穿越)》[WAV+CUE]
- 发烧珍品《数位CD音响测试-动向效果(九)》【WAV+CUE】
- 邝美云《邝美云精装歌集》[DSF][1.6G]
- 吕方《爱一回伤一回》[WAV+CUE][454M]